Uploading to Cloud Storage from Blackmagic Cameras#
You can upload directly to Blackmagic Cloud Folders, DaVinci Resolve Cloud projects or your personal storage from the Blackmagic Camera App and from compatible Blackmagic Cameras.
You can choose to upload proxy files or both proxy and original files in your camera’s setup menu. Refer to your Blackmagic Camera’s instruction manual for more information.
Logging into Blackmagic Cloud#
Before logging into Blackmagic Cloud on your Blackmagic camera, make sure your camera is connected to the Internet.
To log into your Blackmagic Cloud account:
-
Tap a storage indicator on your camera's LCD display to open the media pool.
-
Tap the Blackmagic Cloud icon in the controls menu.

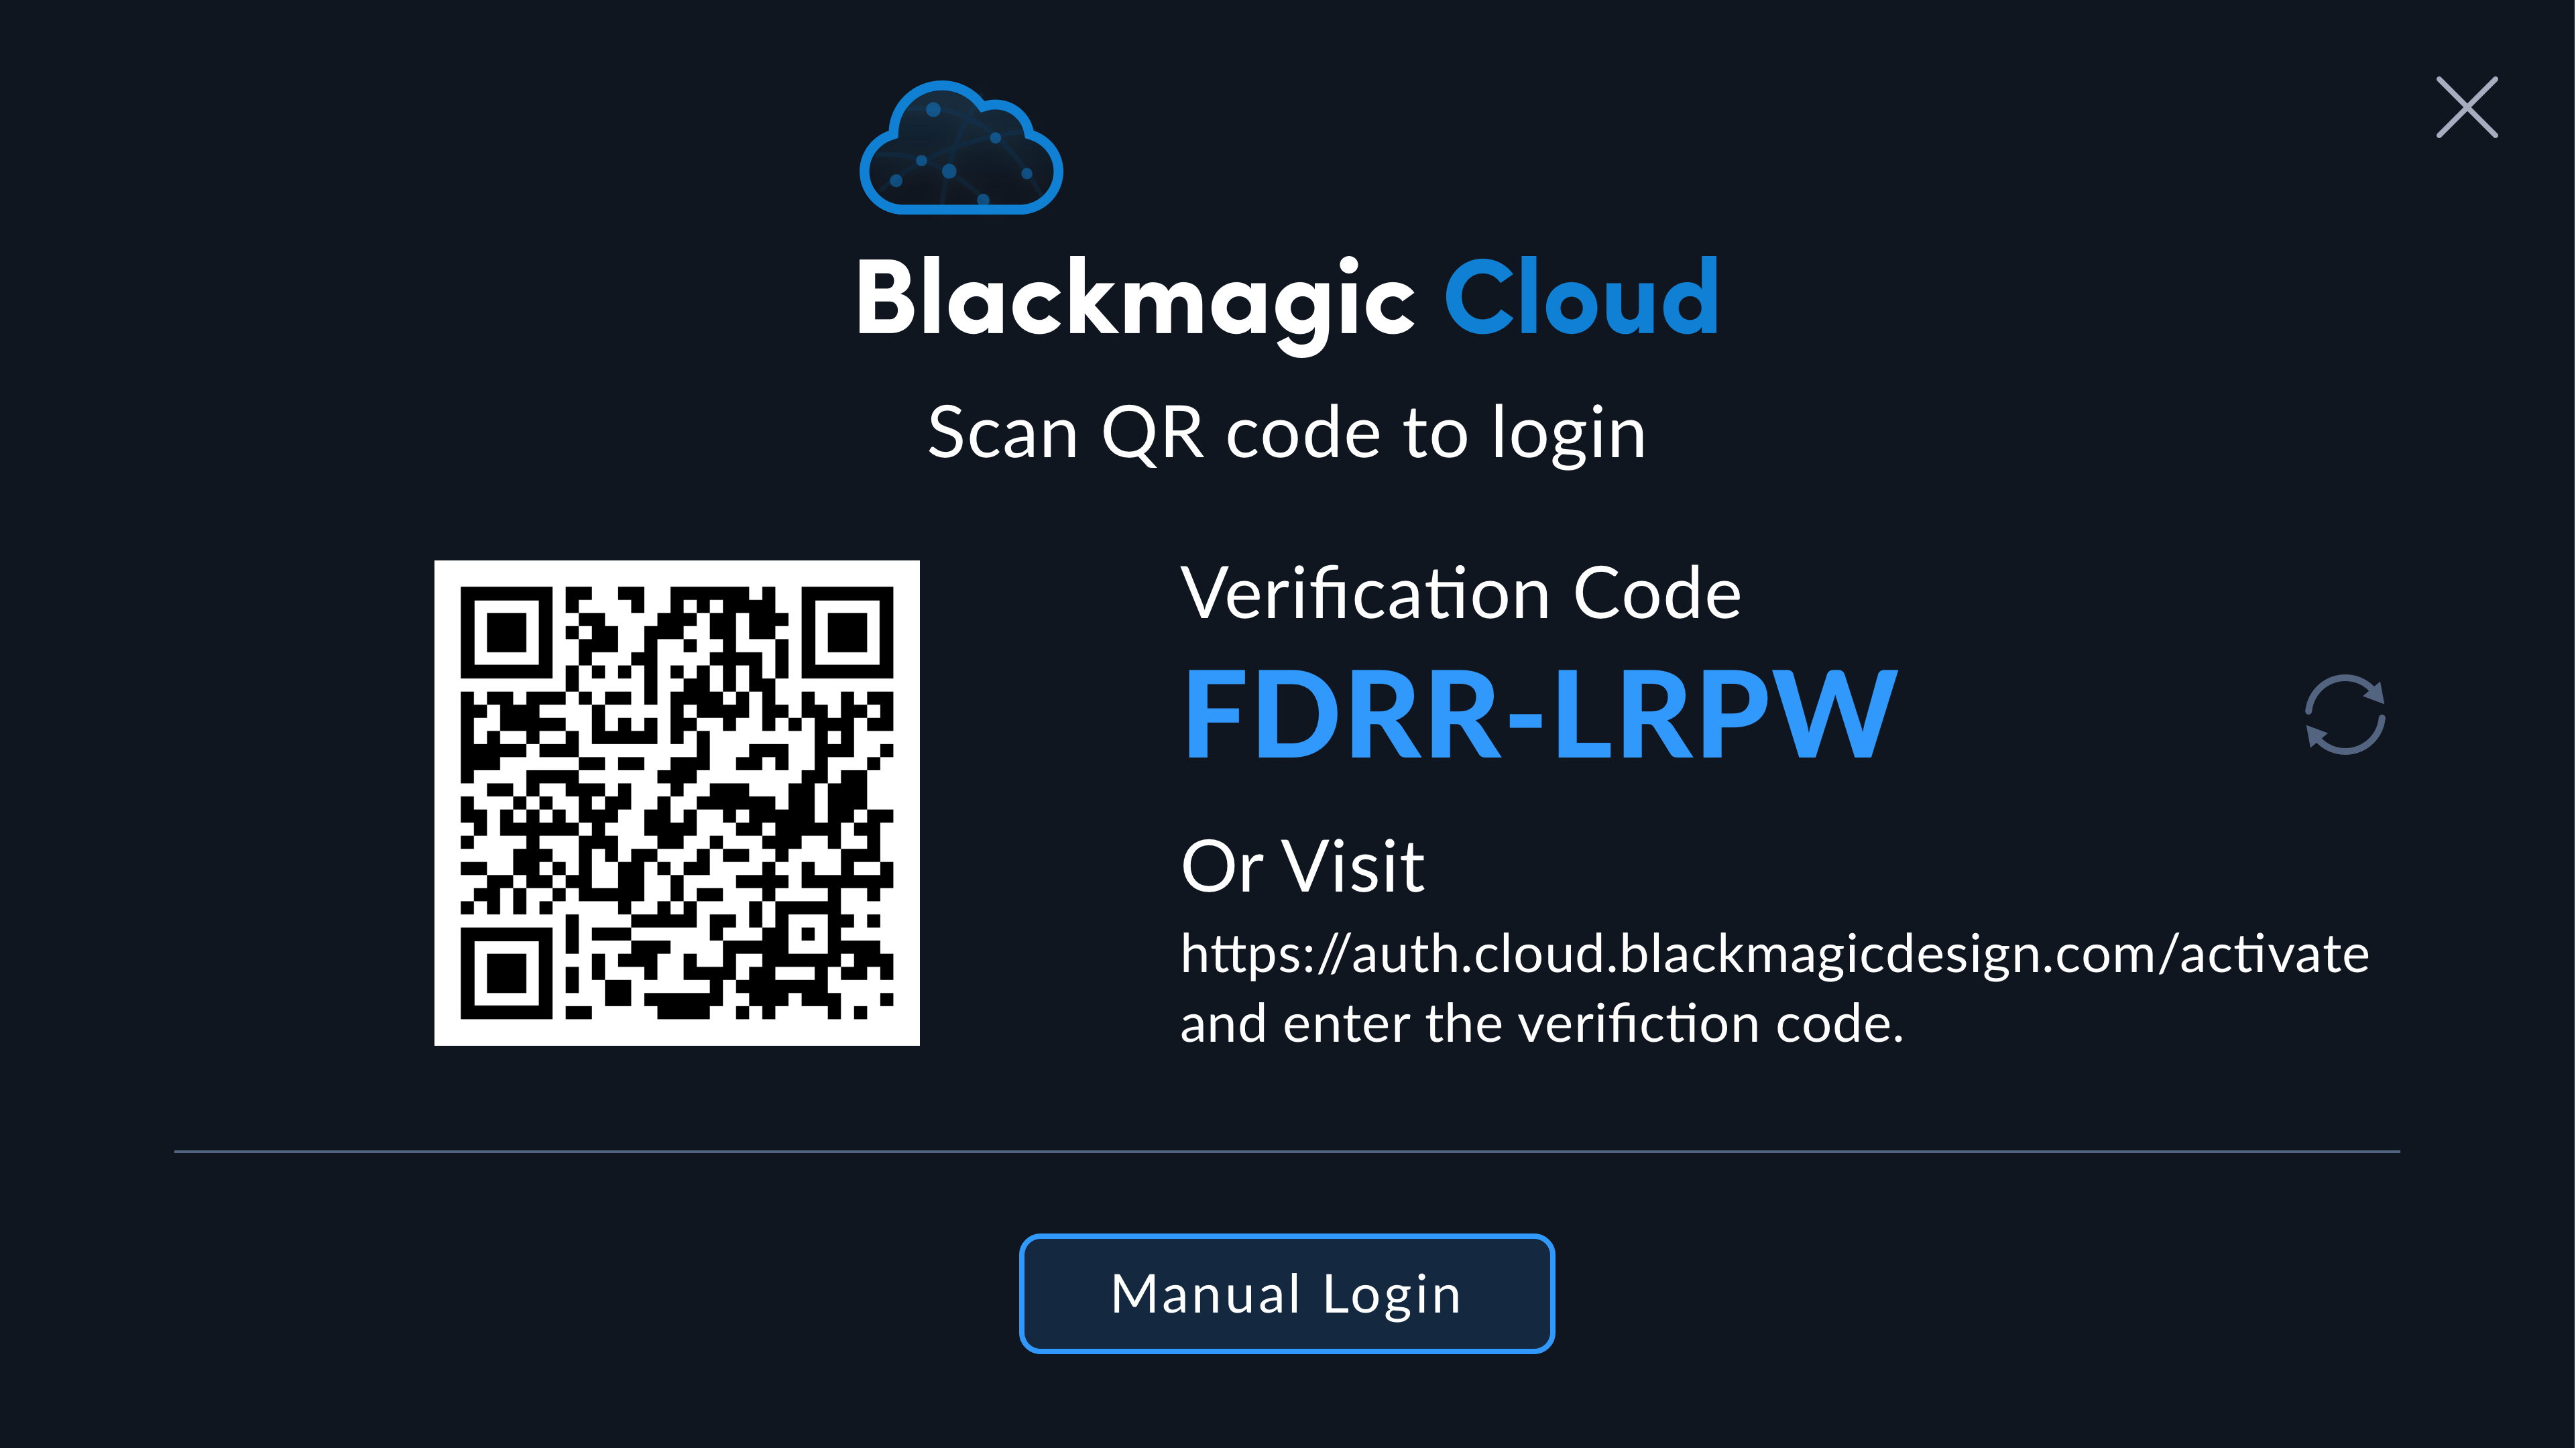
- Use your smartphone's camera to scan the QR code on your camera's touchscreen and follow the prompts on your phone to sign your camera into your Blackmagic Cloud account. Alternatively, you can visit the web address displayed on your camera's touchscreen display and enter the eight digit code.
-
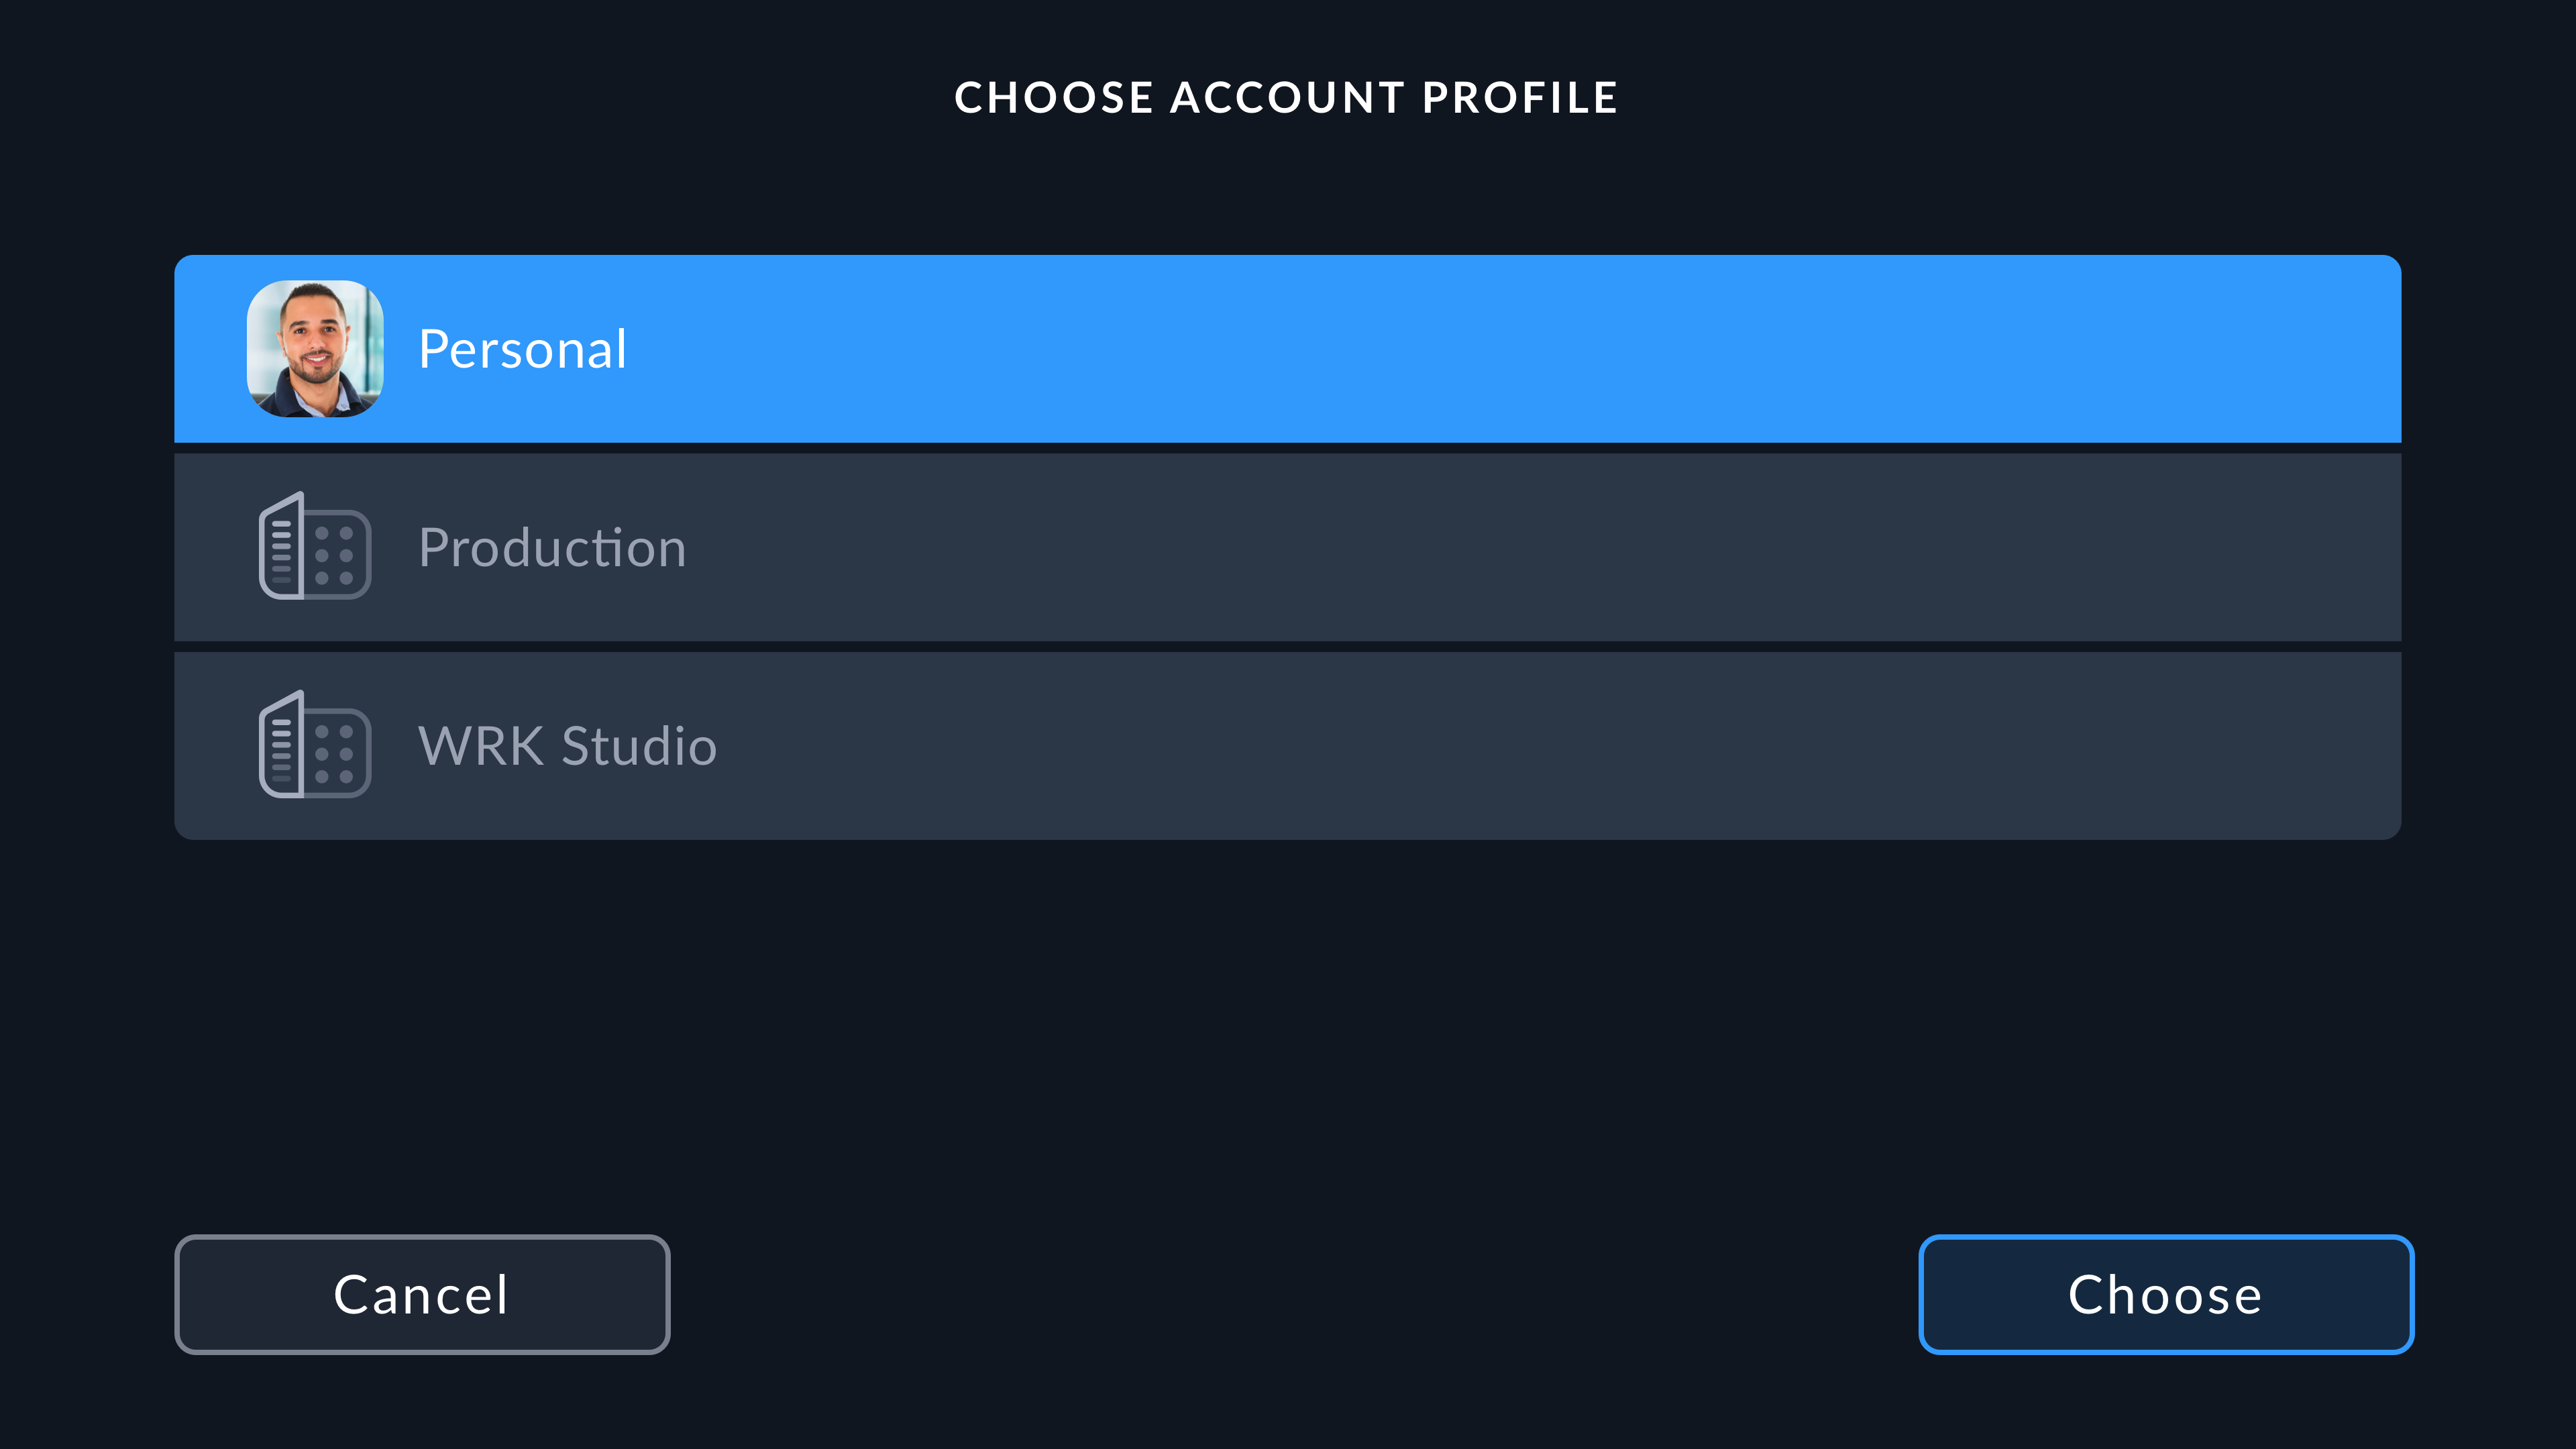
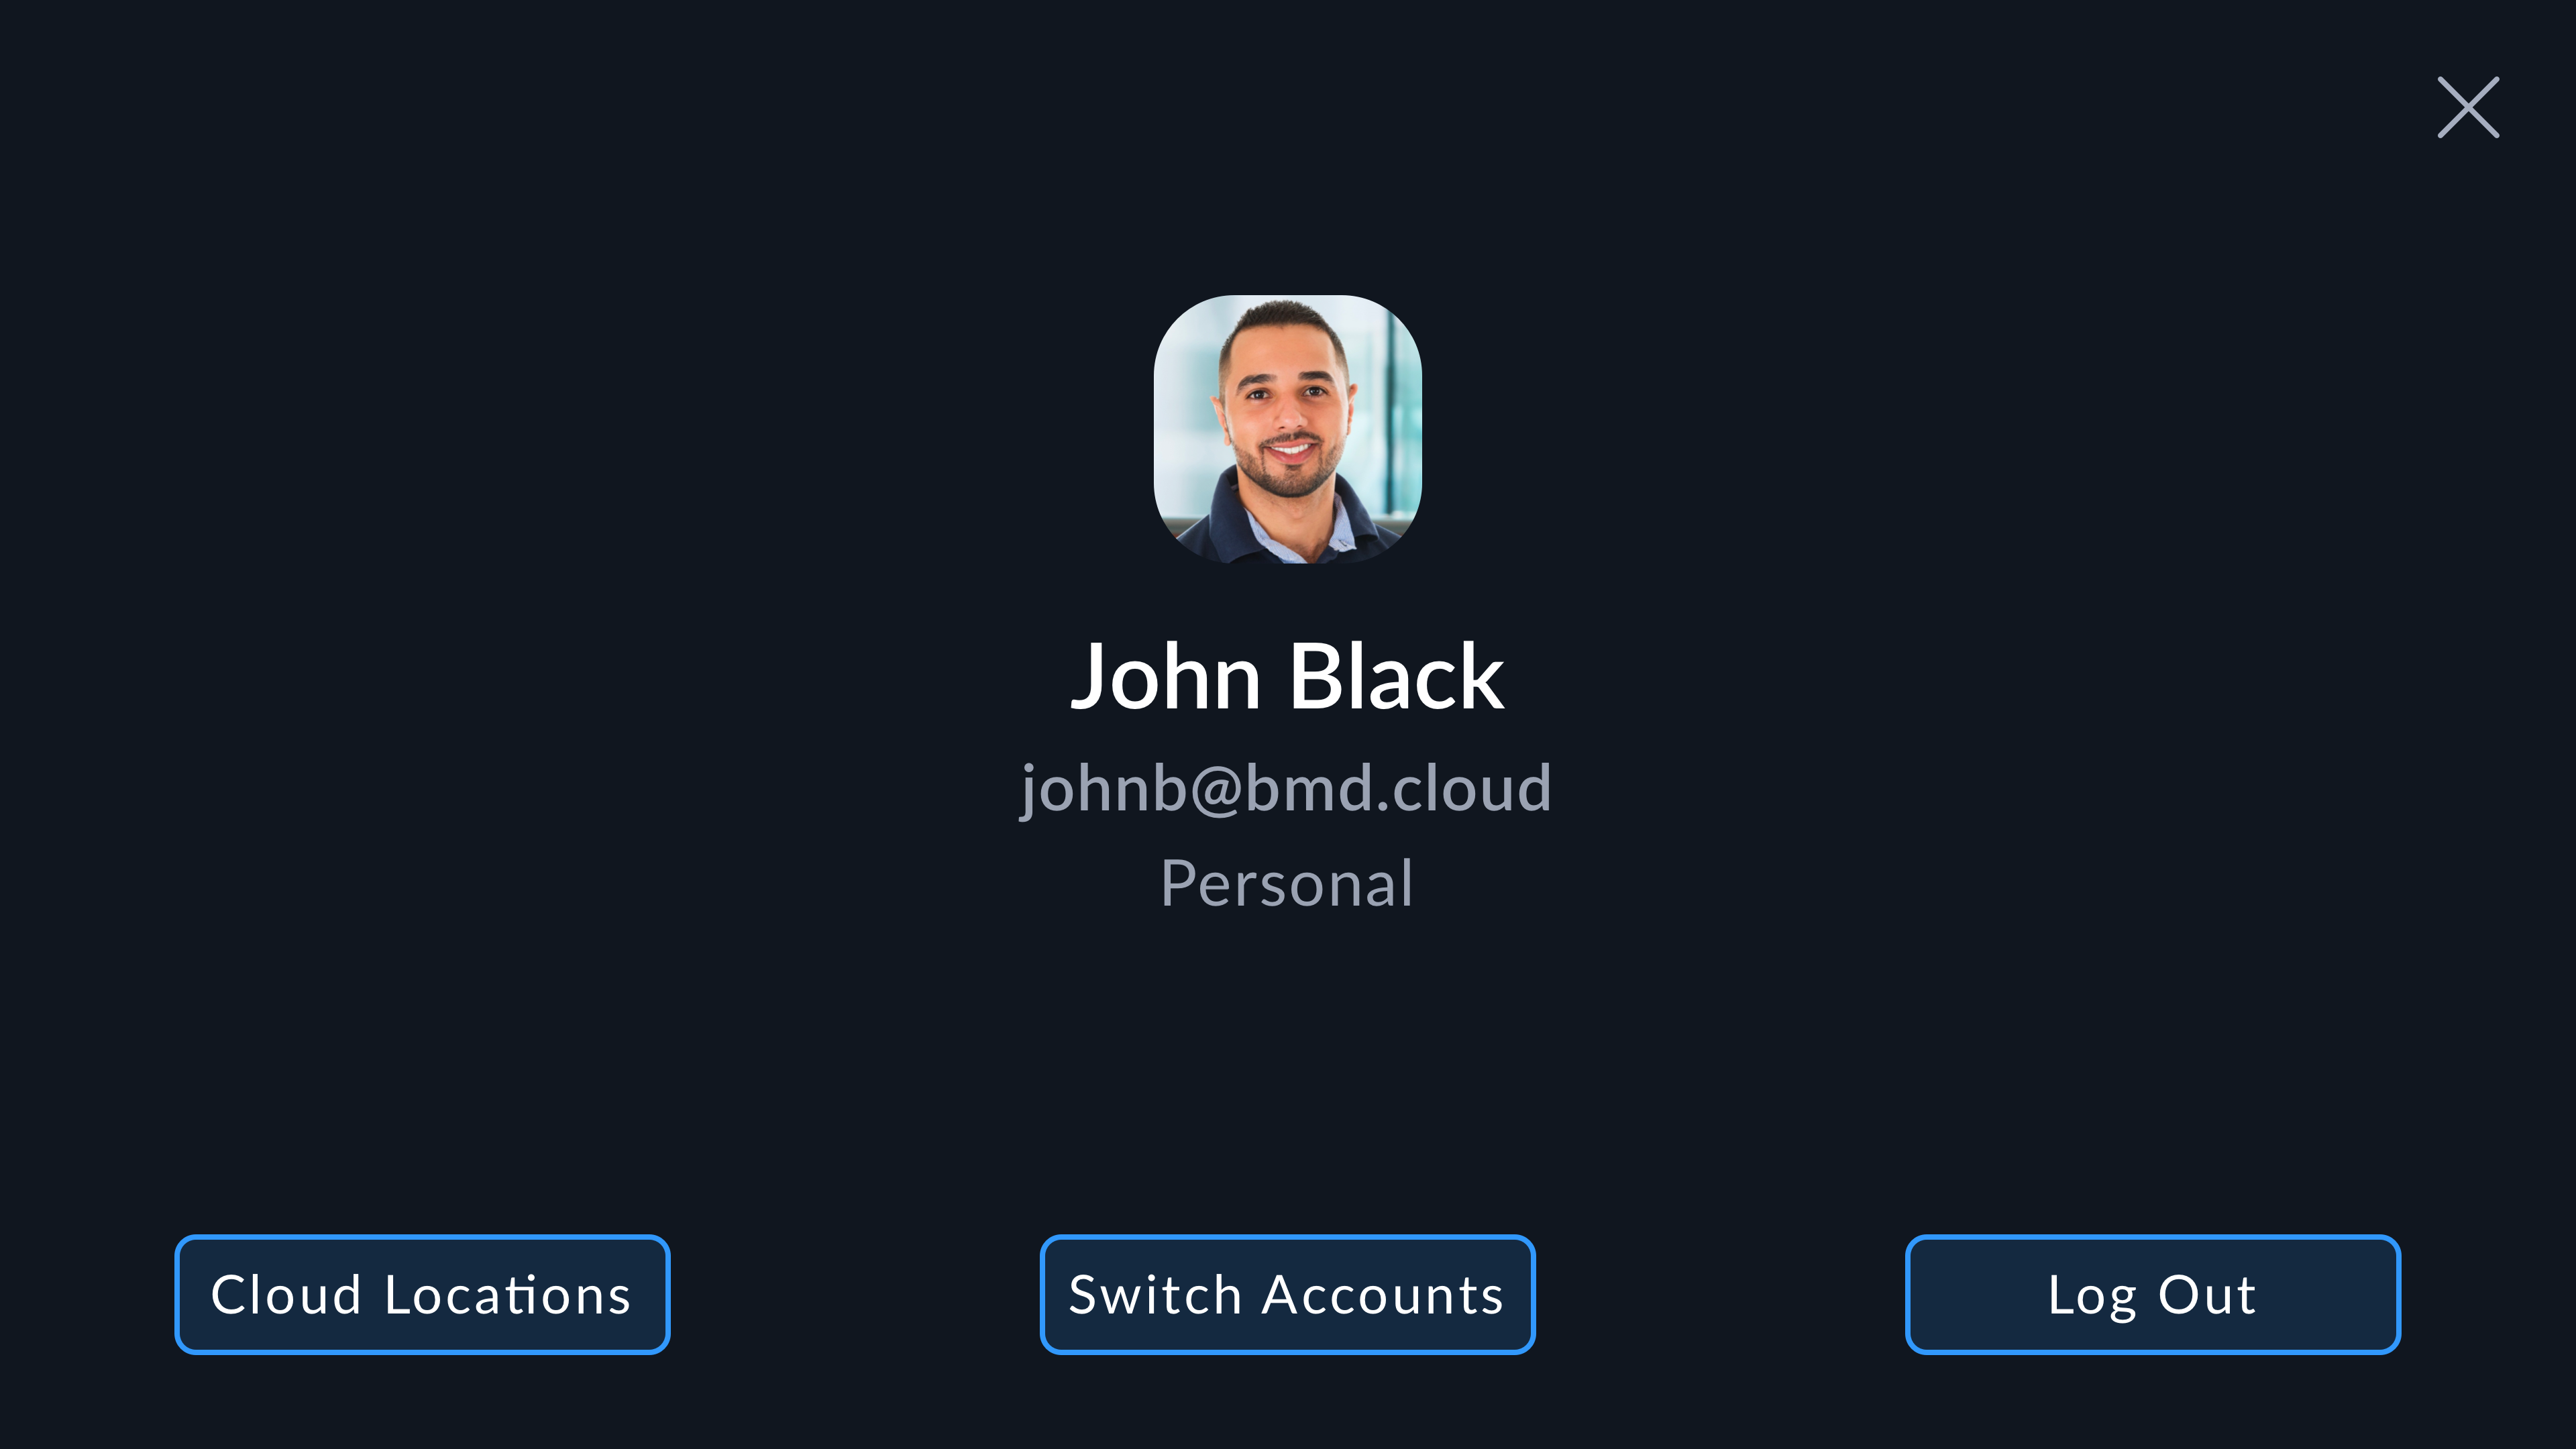
If you are part of a Blackmagic Cloud organization, you can choose to log in to your personal account or to an organization by selecting an account profile from the list and tapping 'choose'.
To enter your login details manually, tap ‘manual login’ and use the touchscreen keyboard to enter your email address and password.
Once logged in, your Blackmagic Cloud avatar will be displayed in the controls menu. You can tap your avatar to switch accounts, log out and select cloud locations.

Allowing Remote Camera Access in DaVinci Resolve#
You can upload clips to both new and existing Blackmagic Cloud projects from your Blackmagic Camera by allowing remote camera access in DaVinci Resolve’s settings. Once remote access has been enabled for a project, it will appear in your camera’s Blackmagic Cloud projects panel.
Allowing access to a new project:
- Open DaVinci Resolve. In the 'project manager' window, select the 'cloud' tab and enter your Blackmagic Cloud login details.
- Select a Blackmagic Cloud project library from the project library list and click 'new project'.
-
With the new project window open, enter the project details. Enable 'allow remote camera access' in the new cloud project window.
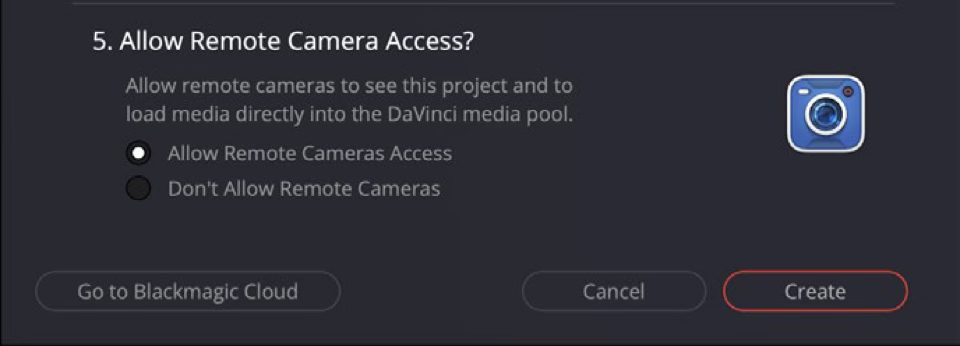
If you want to upload clips to an existing DaVinci Resolve Cloud project, open the project settings and select ‘Blackmagic Cloud’. Enable the ‘allow remote cameras to see this project to load media directly into the media pool’ option in the ‘remote cameras’ settings.

The Blackmagic Cloud project will appear in your Blackmagic camera’s media pool sidebar when your camera is connected to the internet and signed into your Blackmagic Cloud account.
For more information about DaVinci Resolve Cloud projects, refer to the DaVinci Resolve user manual. You can download the manual at https://www.blackmagicdesign.com/support/family/davinciresolve-and-fusion/
Setting Cloud Locations#
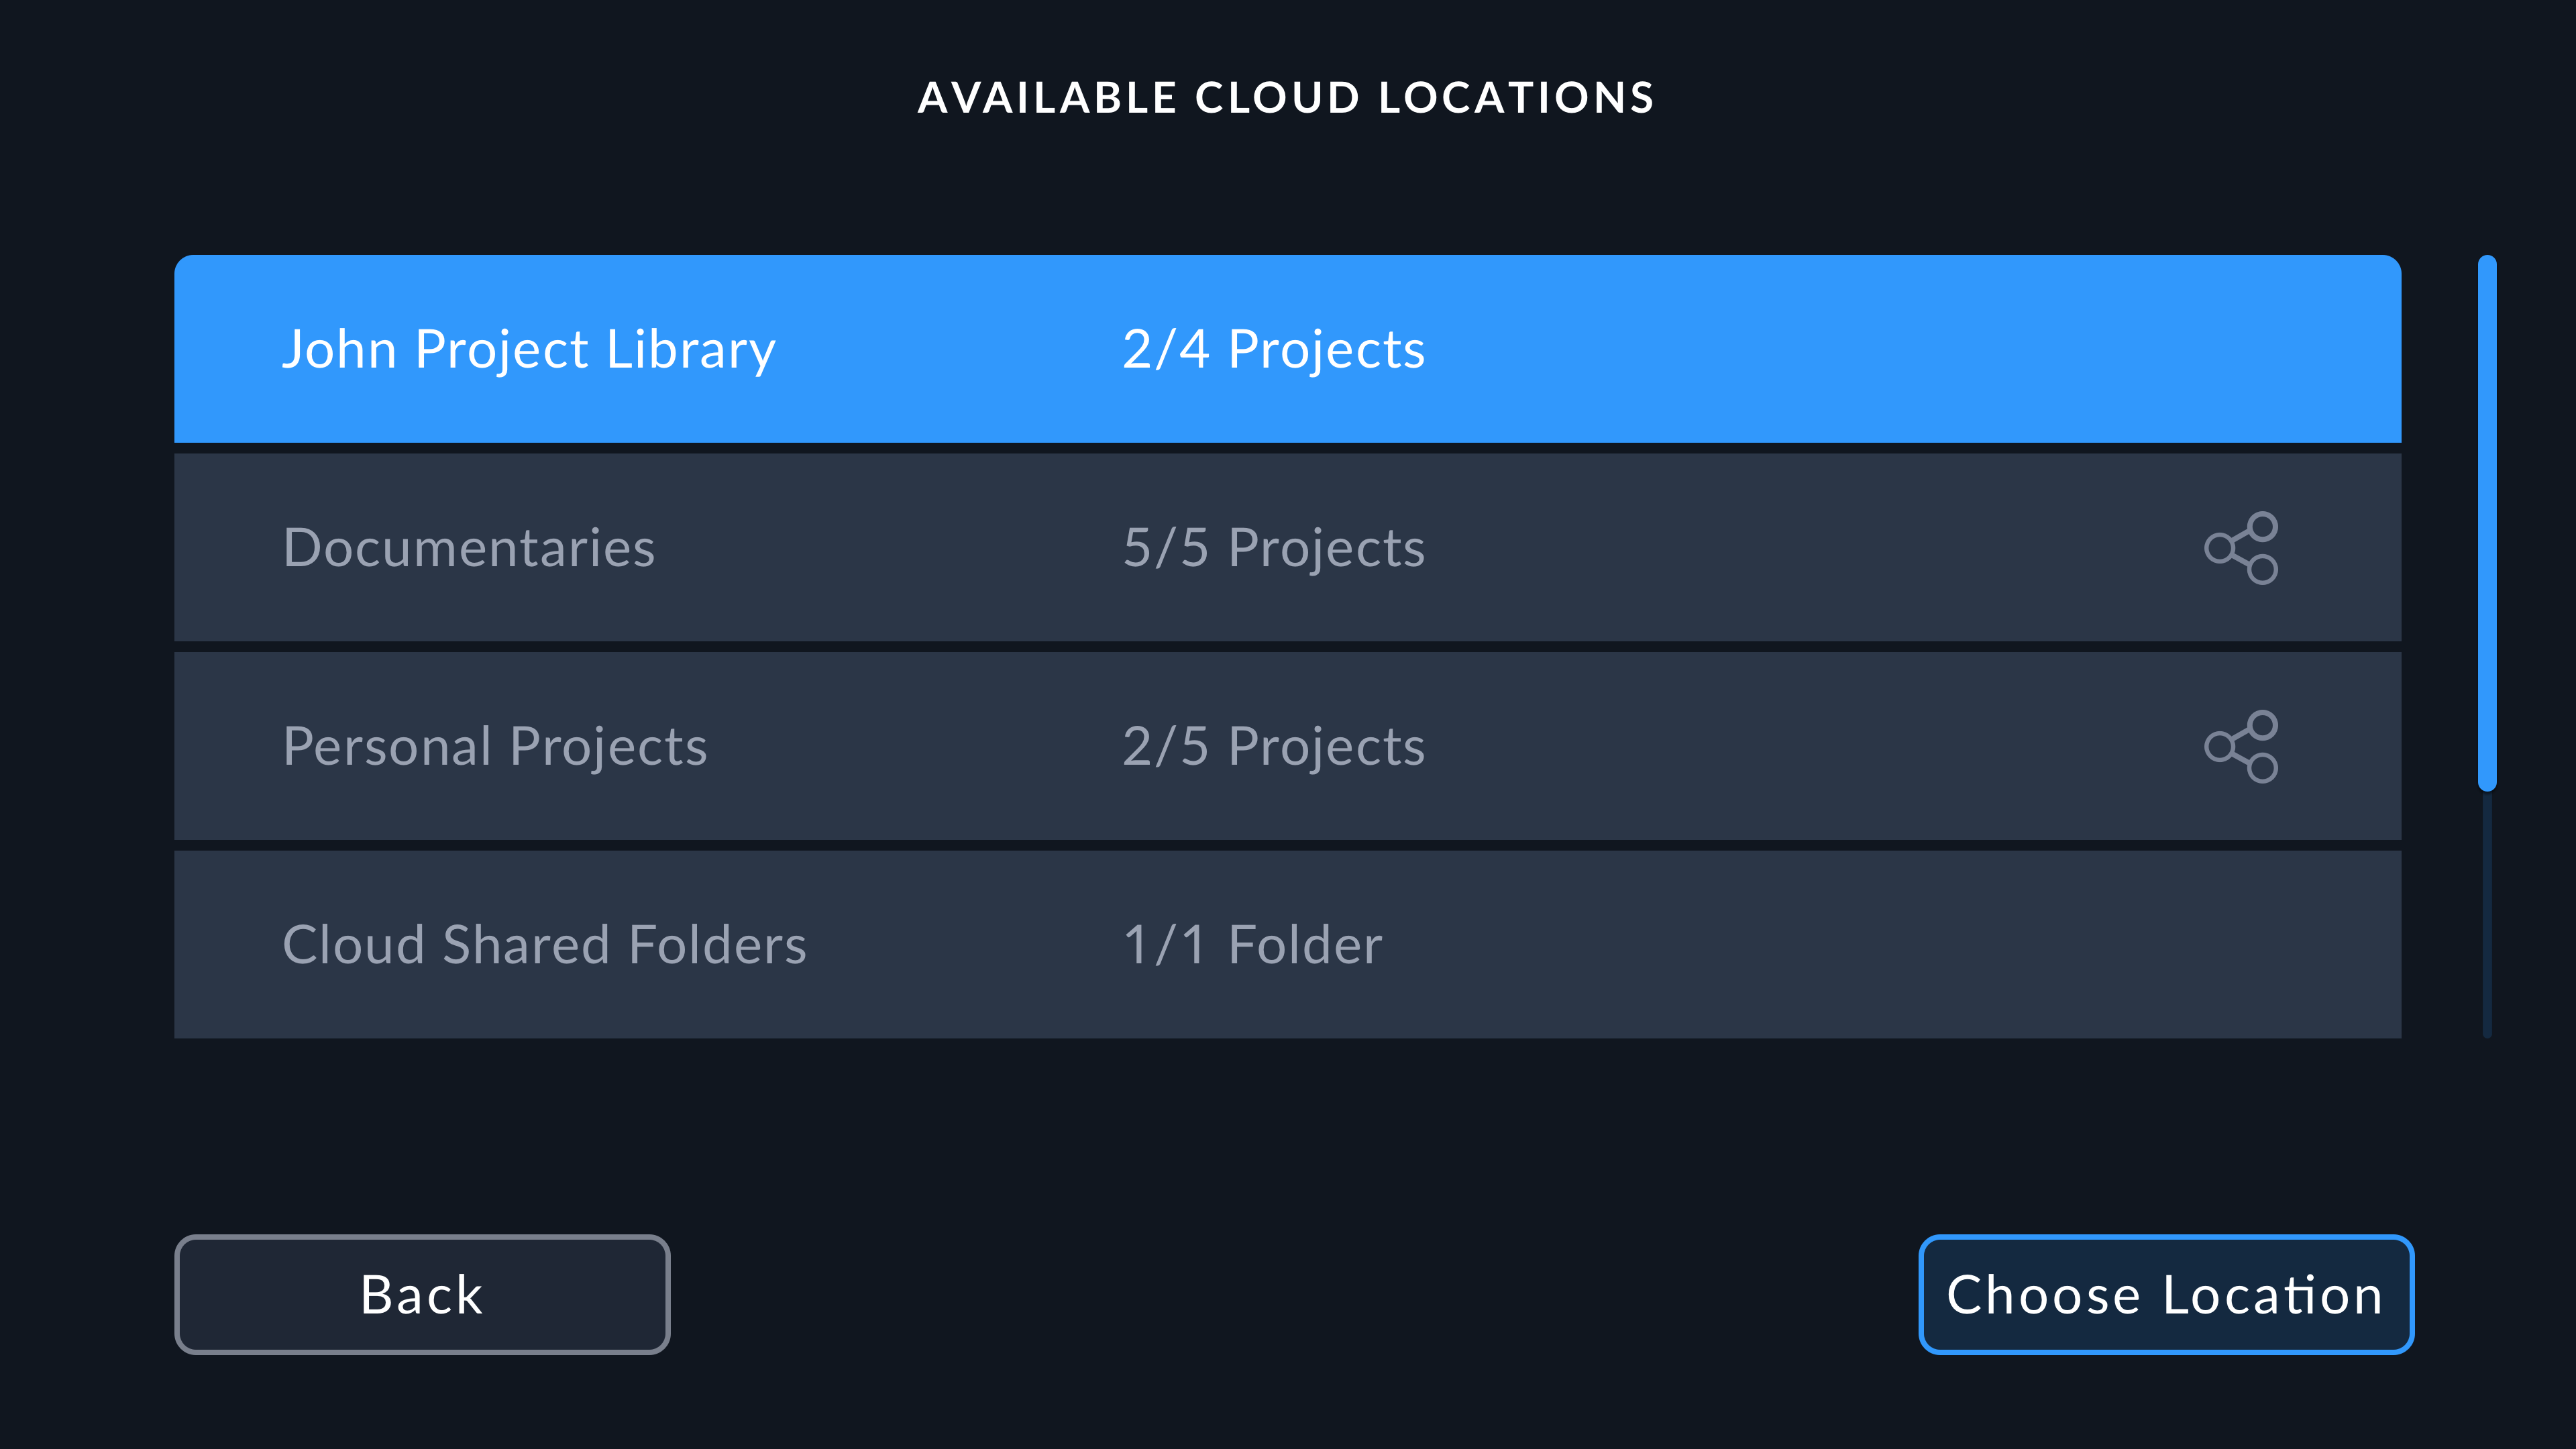
You can choose the DaVinci Resolve Cloud projects and shared folders that your camera will be able to record and upload clips to by selecting them from the ‘cloud locations’ menu.
To set the available cloud locations:
-
Tap on your avatar in the controls menu and tap 'cloud locations'.
-
Select an available cloud location from the list and tap 'choose location'.
-
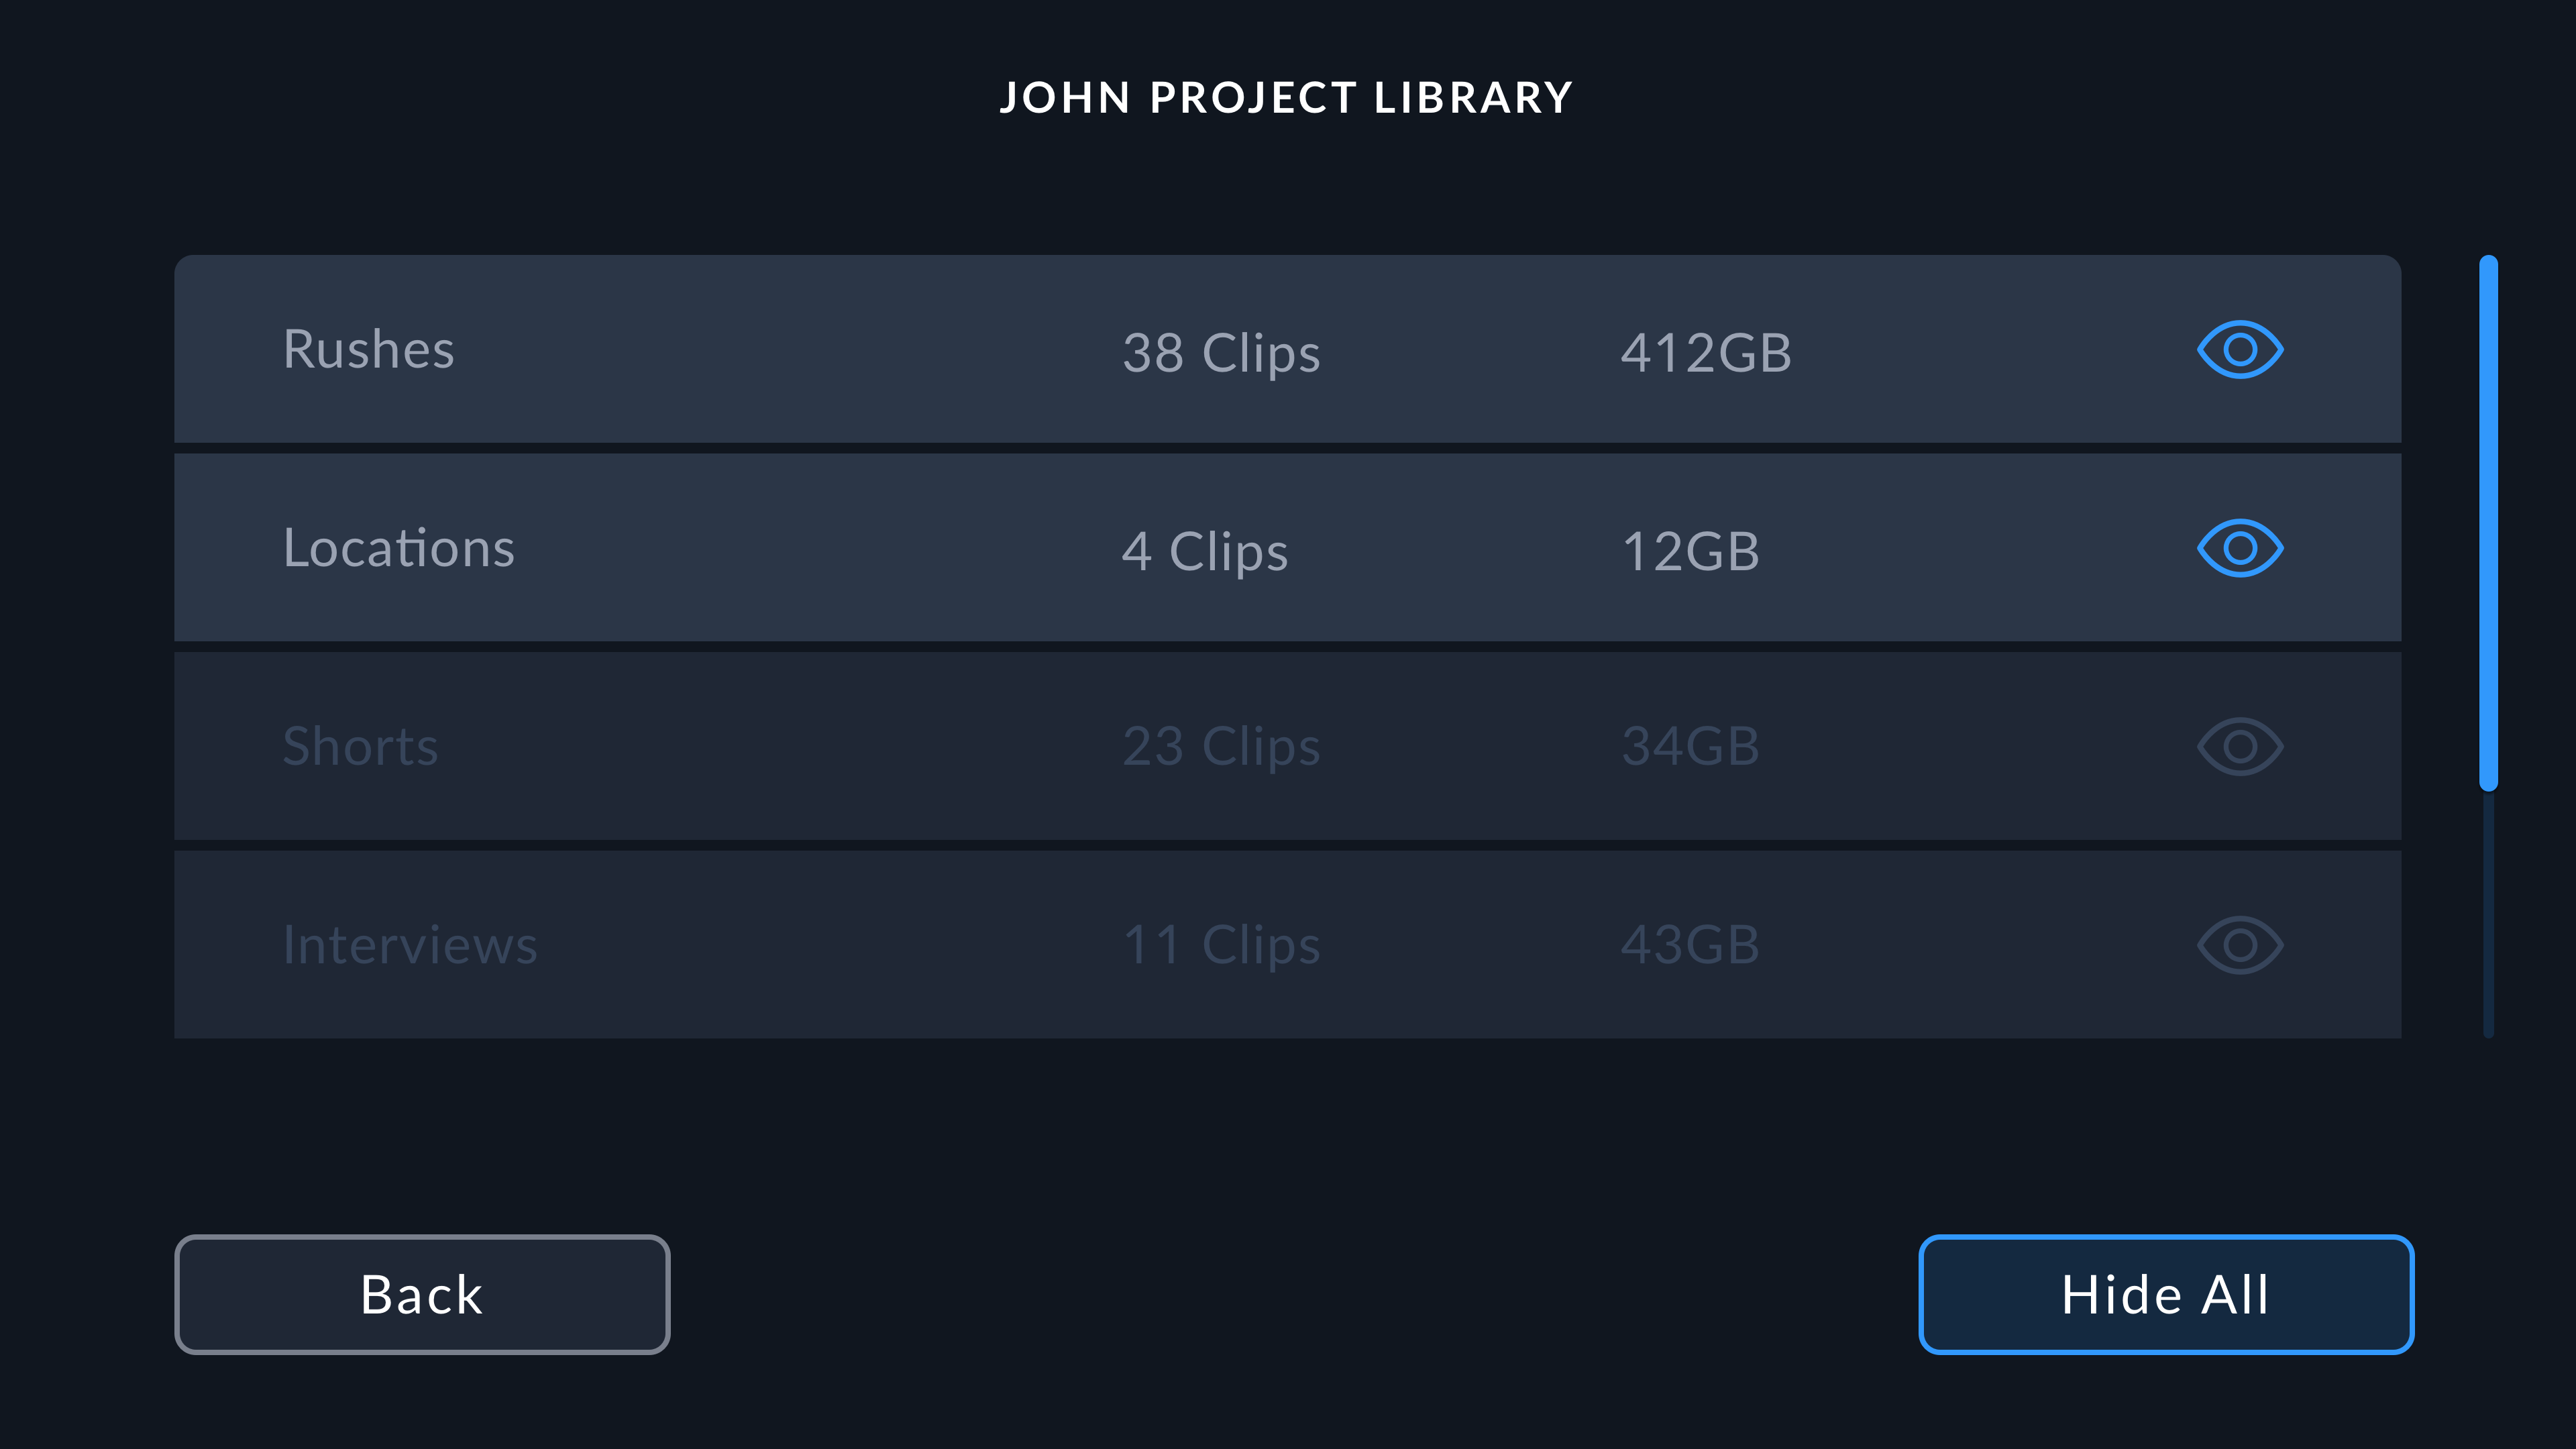
In the project library list, tap the 'eye' icon next to a project to show or hide it. To hide all the projects in a library, tap 'hide all'. Once you've selected your projects, tap the 'back' button.
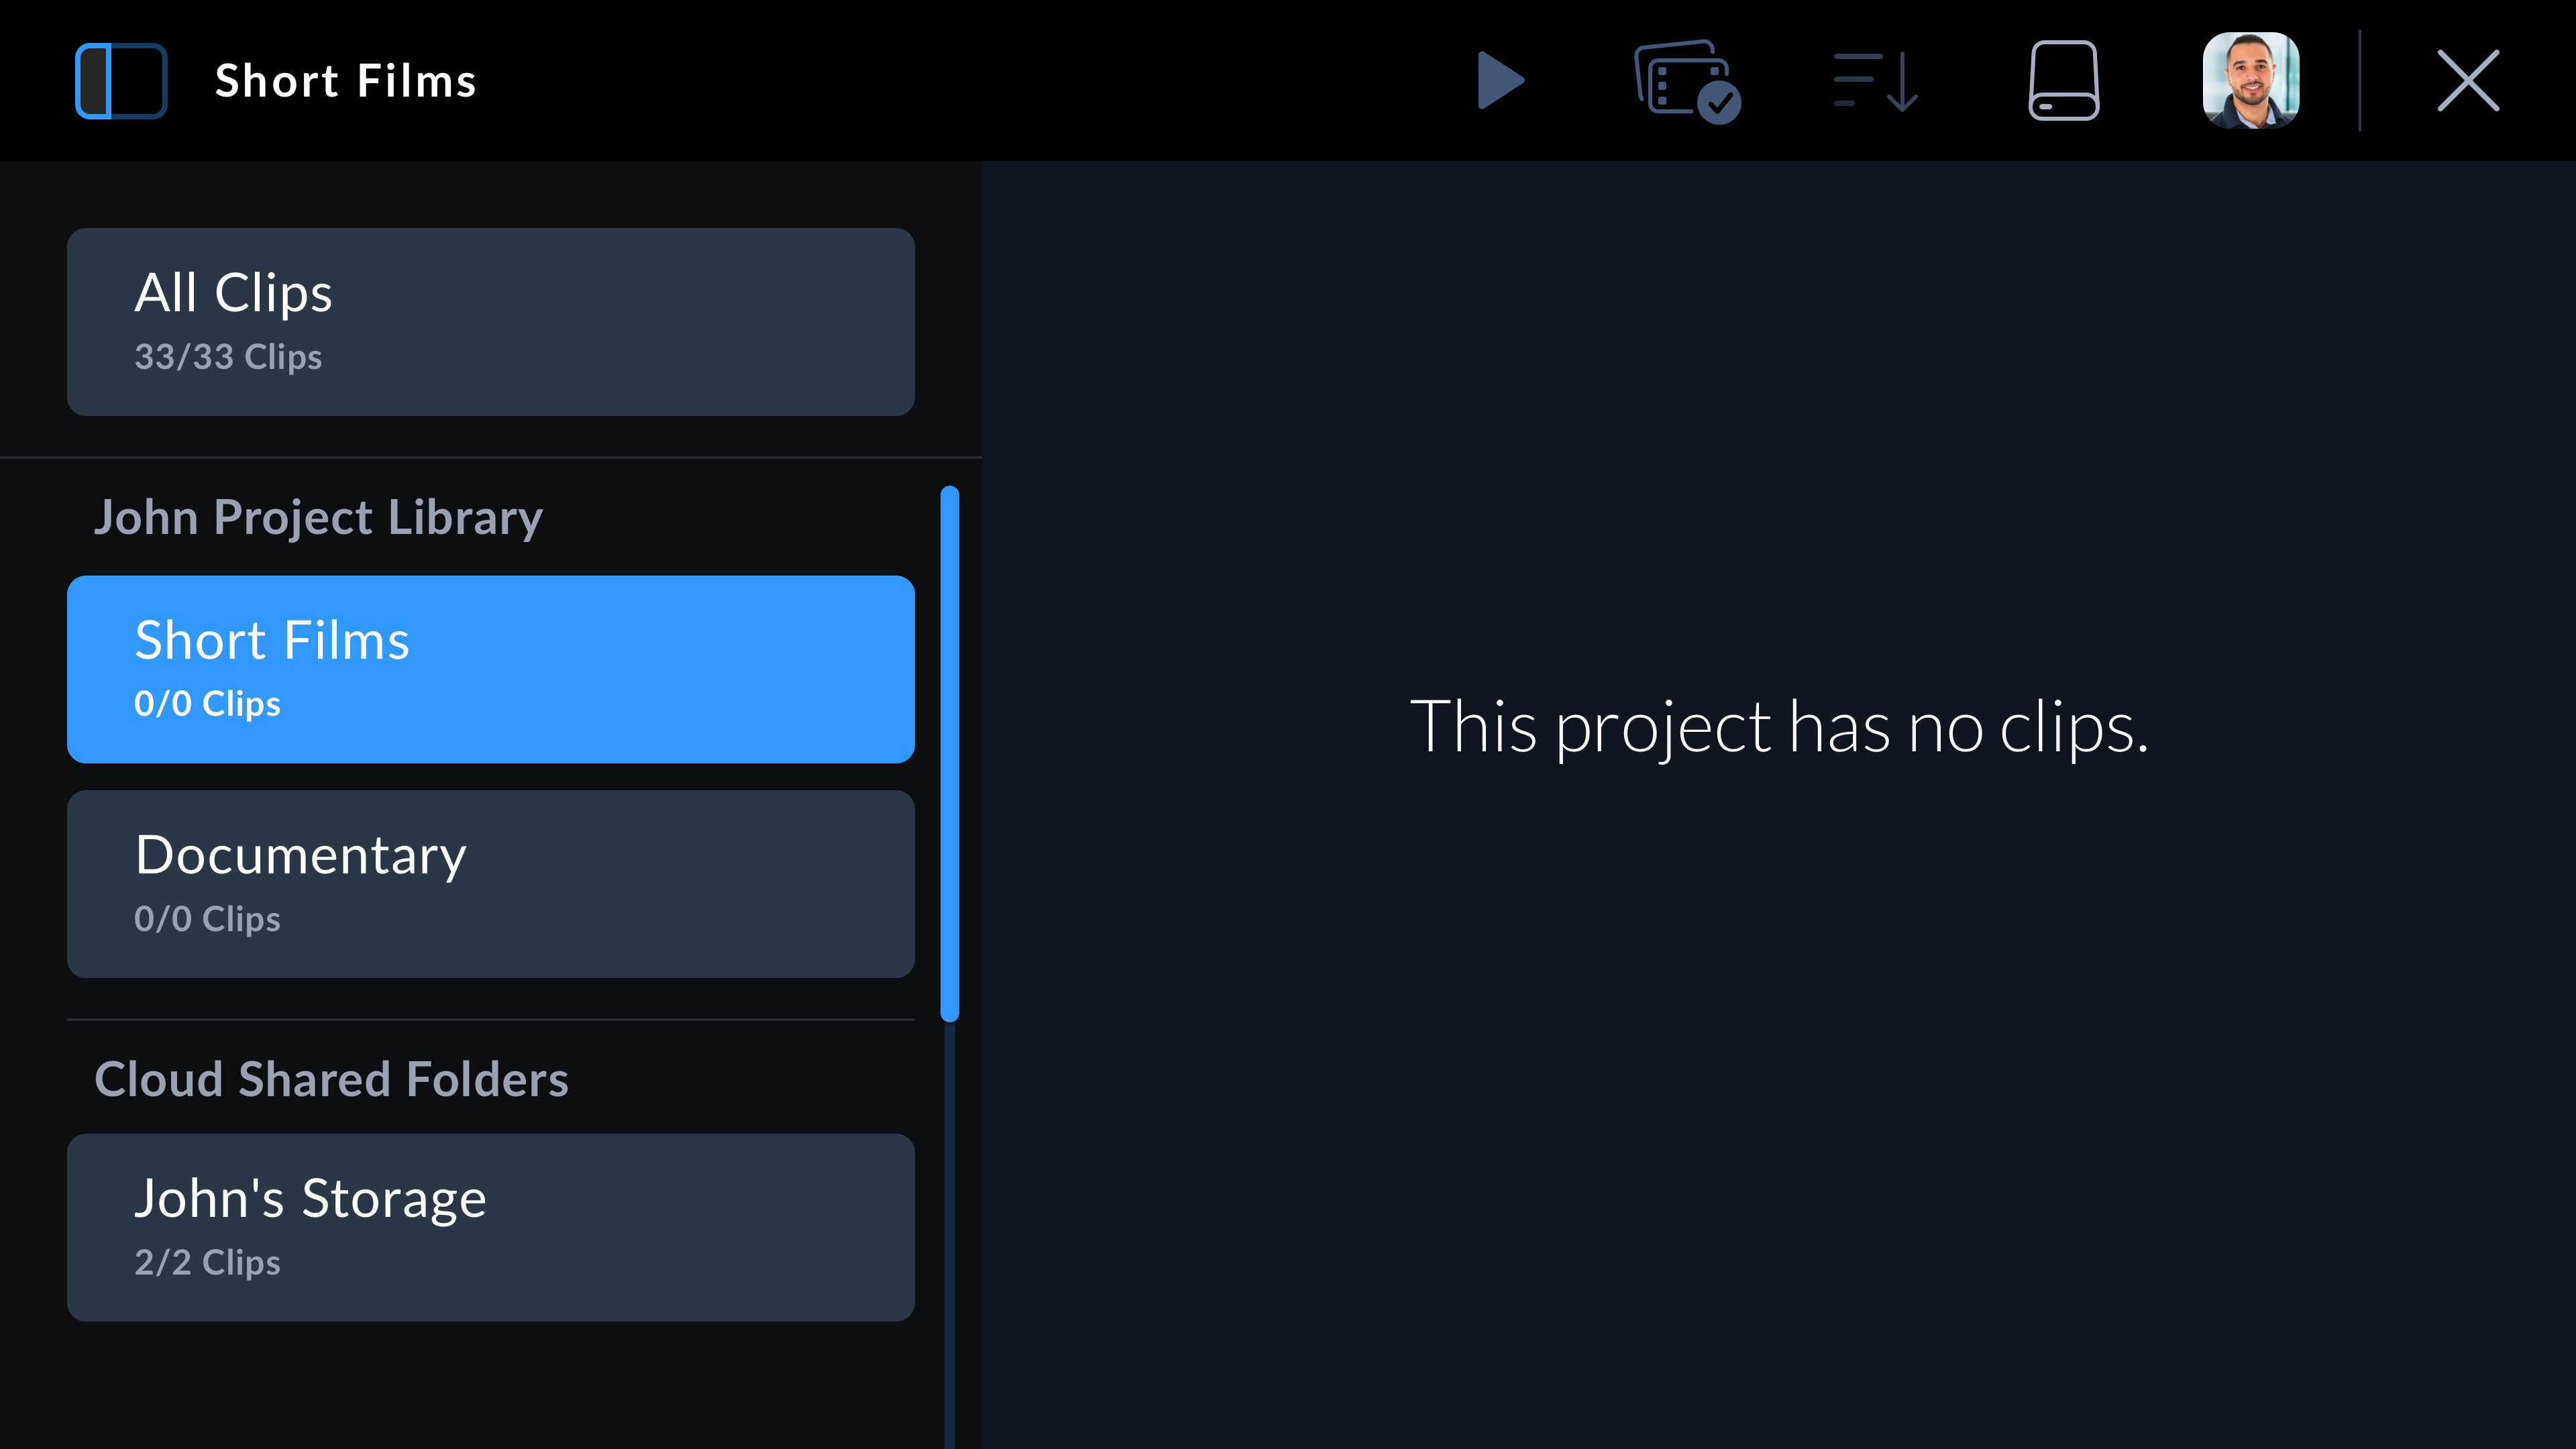
Blackmagic Cloud Projects Panel#
Tap the sidebar icon at the top left of the touchscreen to open the Blackmagic Cloud projects panel.
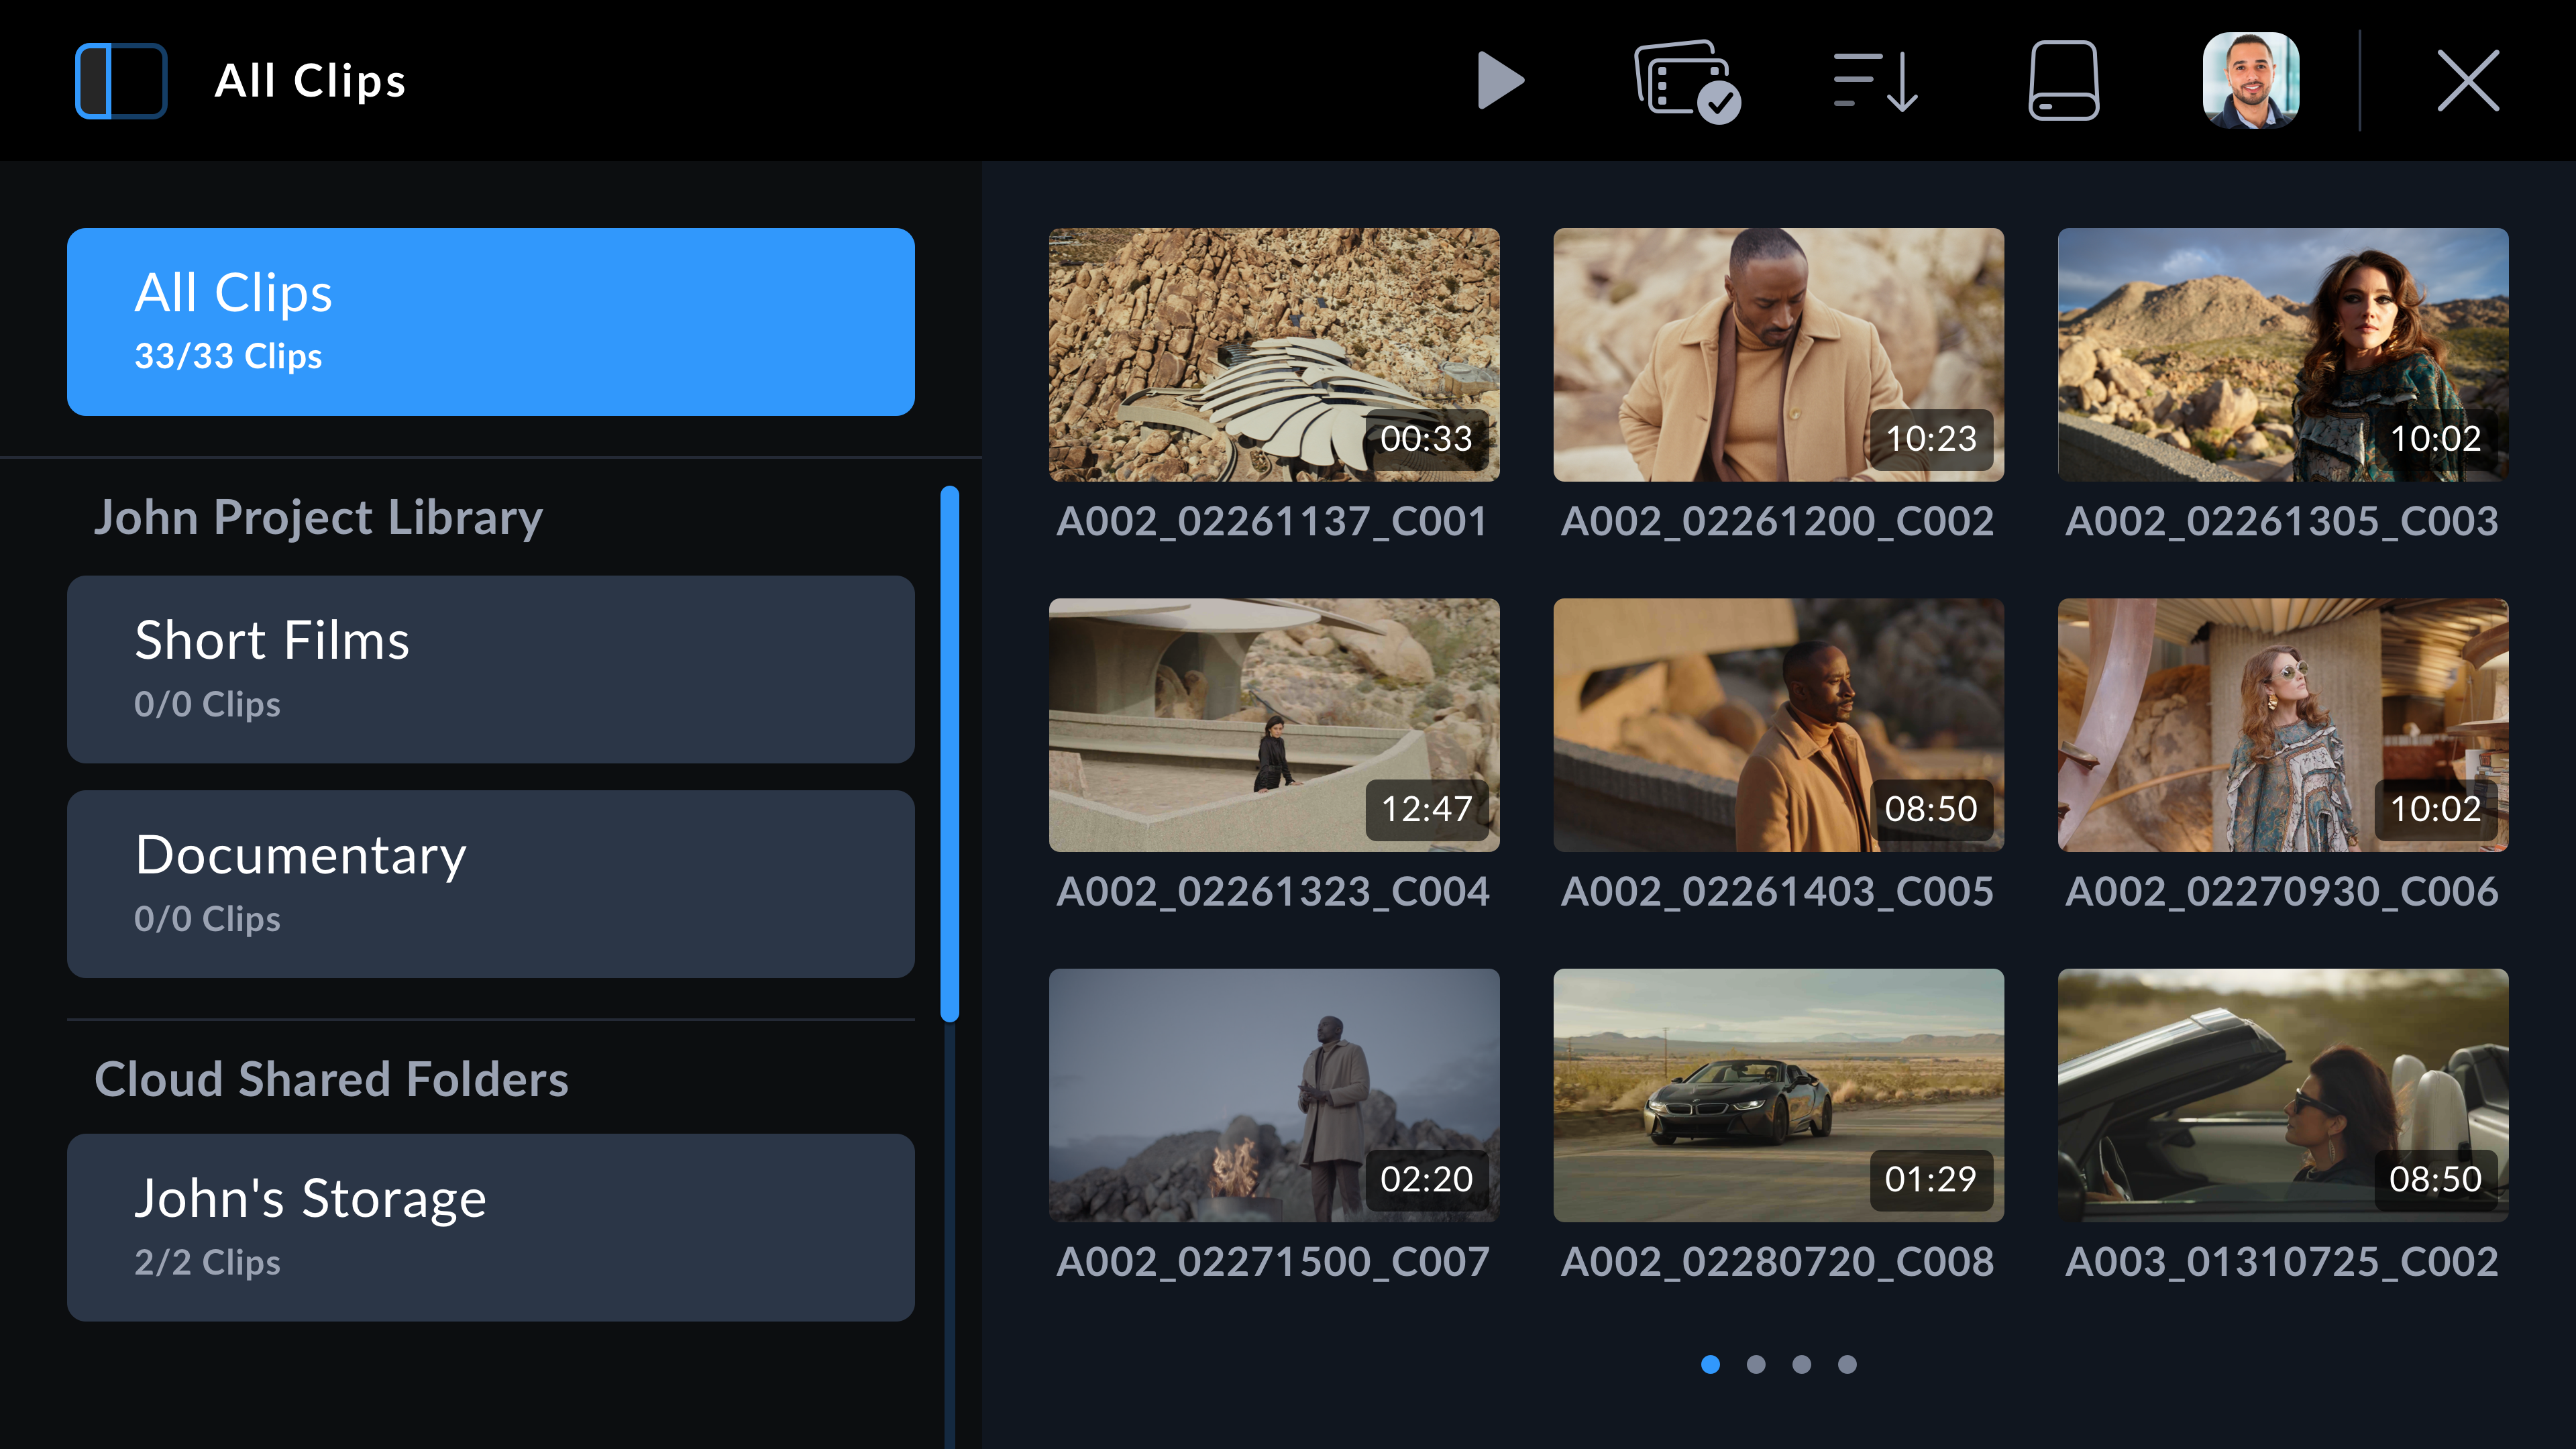
When you are signed into your Blackmagic Cloud account, projects that you can upload clips to are listed in the ‘Blackmagic Cloud’ section of the viewer.
Uploading Clips to a Blackmagic Cloud Project#
Selecting a Blackmagic Cloud project lets you upload proxy files, or both proxies and originals, as you record clips to your camera’s media. When a project is selected in the projects panel, a clip will be immediately uploaded as soon as you stop recording on your camera. This will happen in the background as you continue recording clips for as long as your camera is connected to the Internet and logged into your Blackmagic Cloud account.
To upload to a Blackmagic Cloud project:
-
Tap on a Blackmagic Cloud Project to select it.
- Tap the 'x' at the top right of your camera's touchscreen or press the camera's 'record' button to close the media pool and return to the HUD.
- The name of the selected Blackmagic Cloud project will appear above the timecode display on your camera's HUD. The next time you record a clip, your camera will automatically start uploading media to the selected cloud project.
If your camera’s internet connection is interrupted, the name of the cloud project will be grayed out and uploads paused. Your camera will automatically restart the uploading process when the internet connection is restored.

When you have finished recording, tap on your camera’s storage indicator to open the media pool and view the upload status of your clips.
Your Blackmagic Cloud avatar will remain visible in the controls menu and you will stay logged in even if you have disconnected your phone or removed the Ethernet connection. This ensures that any recordings you have in your project upload queue will resume as soon as possible after plugging in your phone or network again. Your camera will immediately try to reestablish your internet connection and resume any uploads it has in its queue.
This also means when you choose to record directly into a project, you can operate in areas with patchy cellular coverage and not worry about reconnecting to upload as the process happens automatically. For example, you could record clips in locations where there is no Internet connection or cellular signal at all and then simply plug in when you are in range or have a wired Internet connection and quickly upload your proxies then.
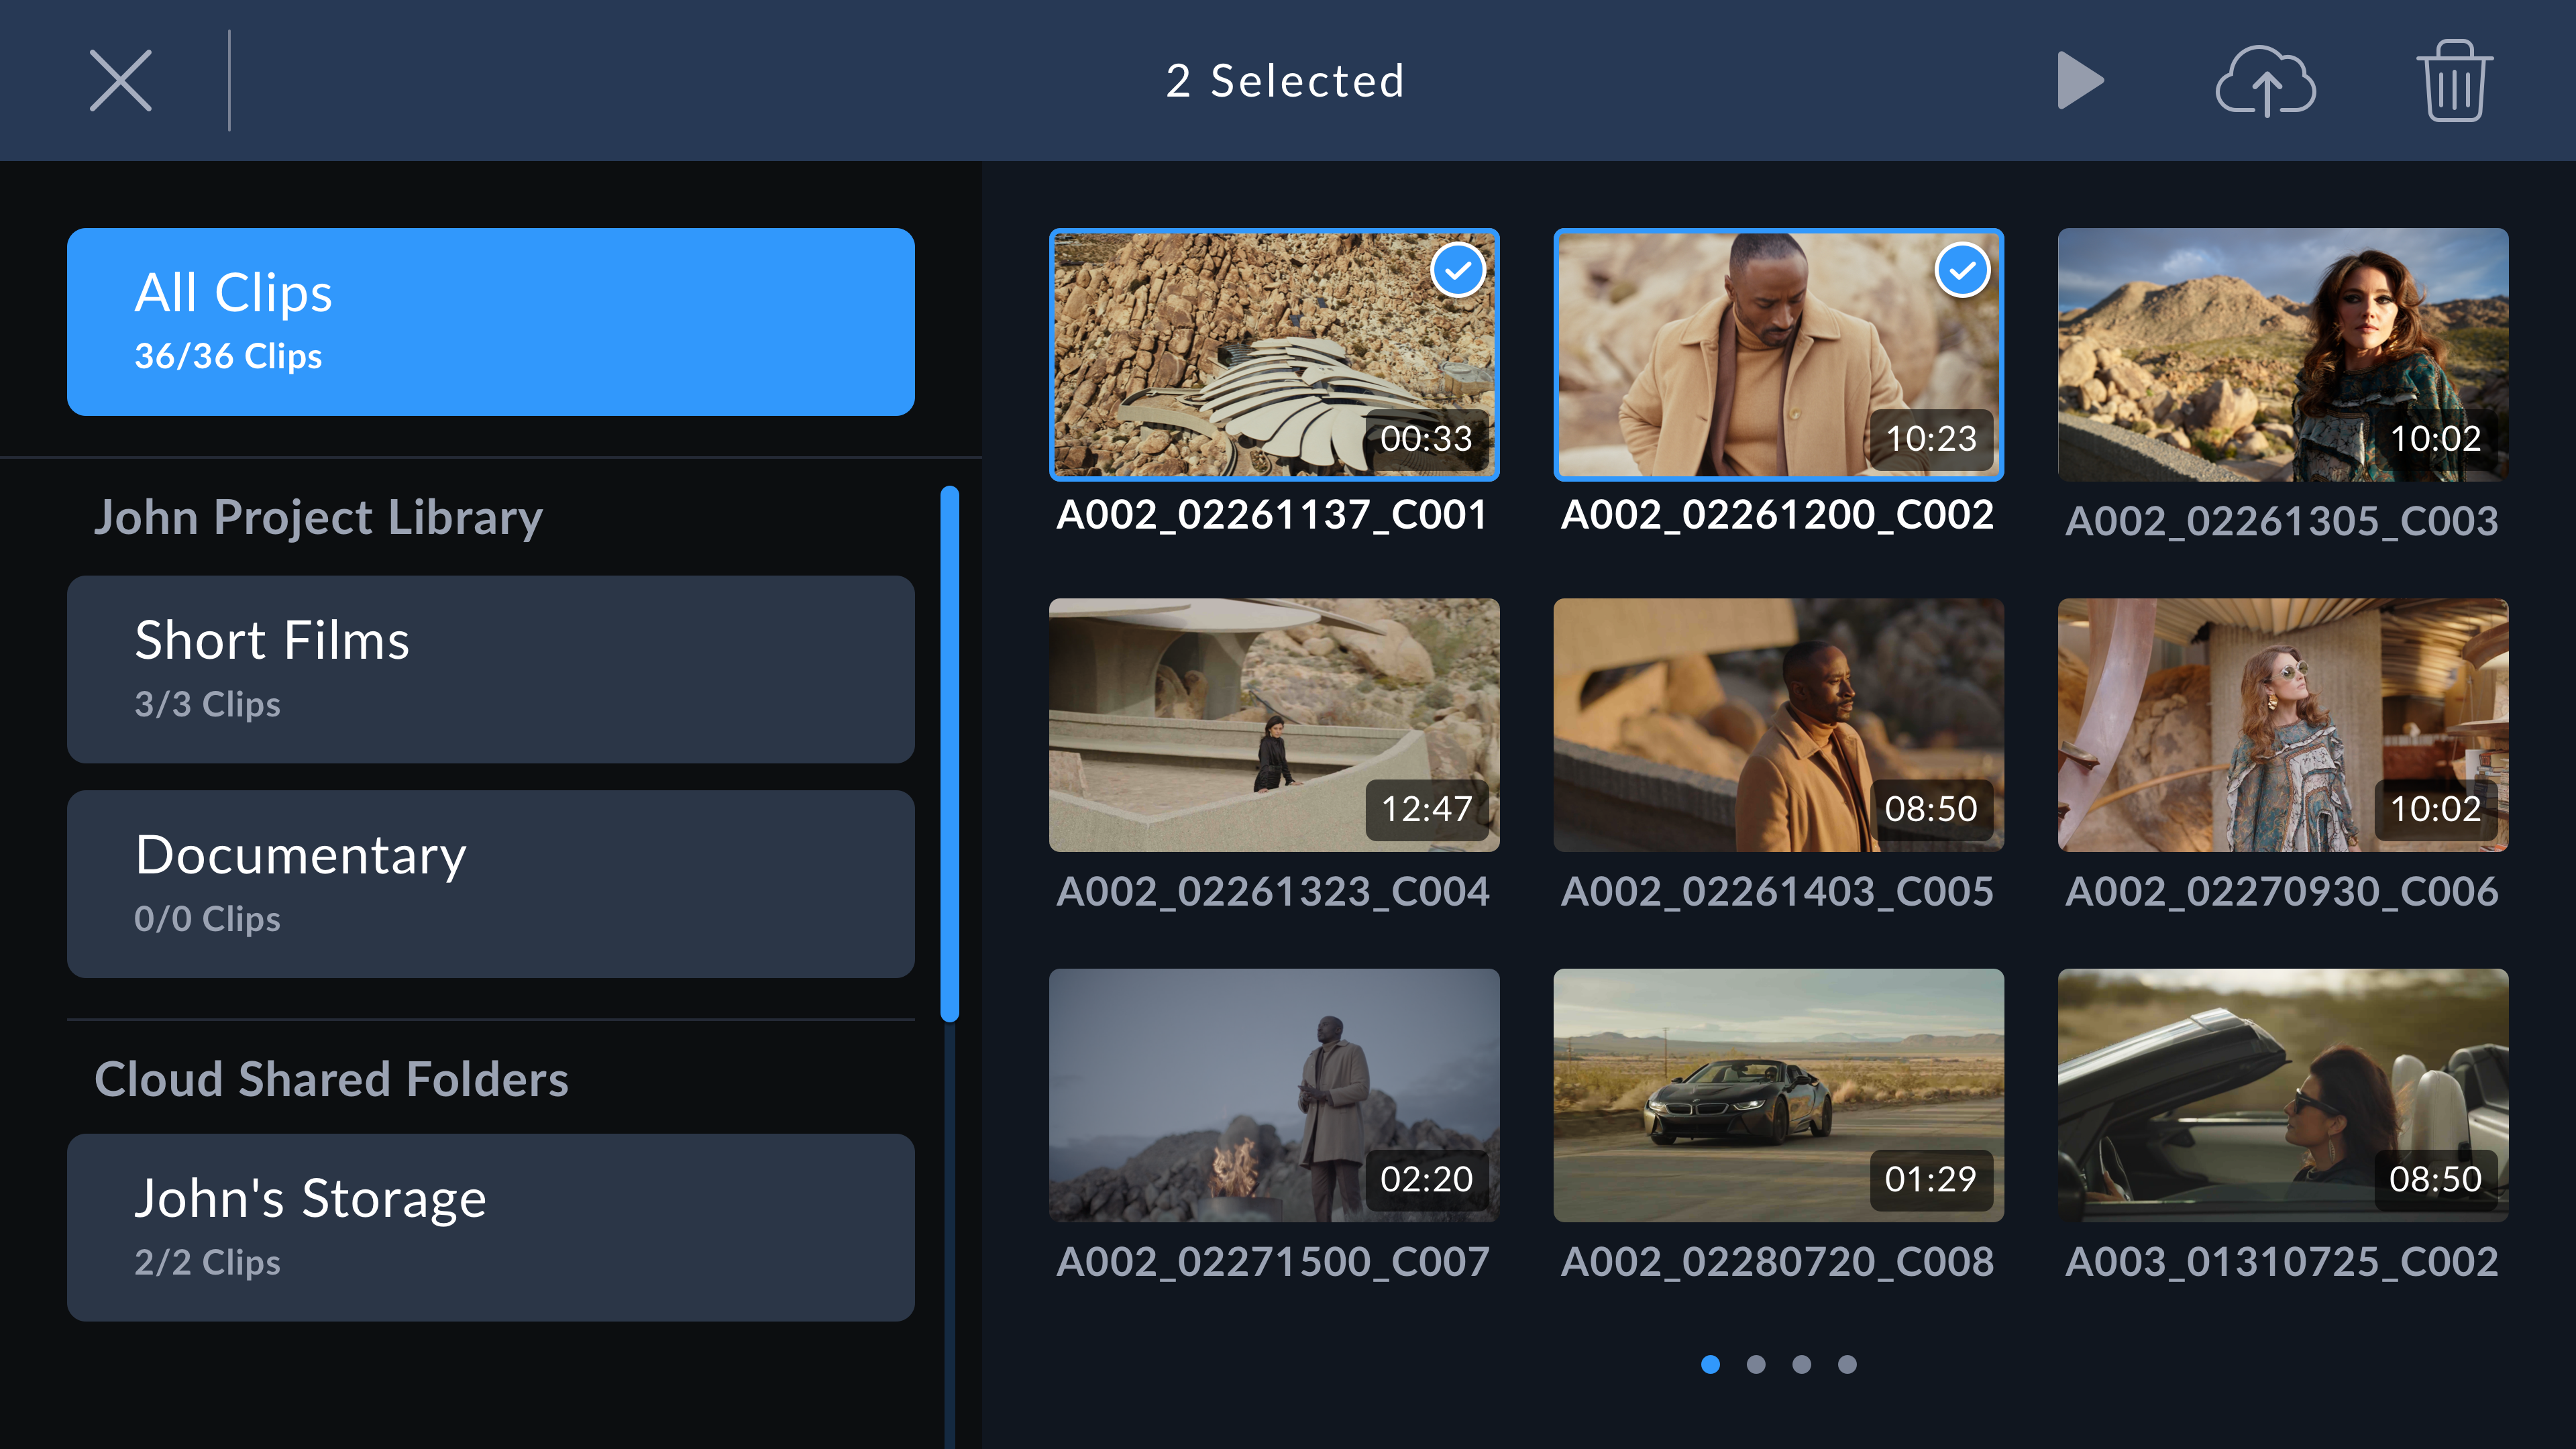
Selectively Uploading Clips to Projects#
If you prefer, you can choose not to upload to a project until after your shoot and then upload a single clip to a project, more than one project, or even your private storage all at once. You can also use the group select tool to select multiple clips to upload at once to one or many locations.
To upload recorded clips to a Blackmagic Cloud project:
- Log in to your Blackmagic Cloud account.
- Tap the sidebar icon and select 'all clips'.
-
Tap the 'group select' icon in the controls menu and select the clips that you want to upload.
-
Tap the 'cloud upload' icon. Select the Blackmagic Cloud projects that you want to upload your clips to by tapping the project names.
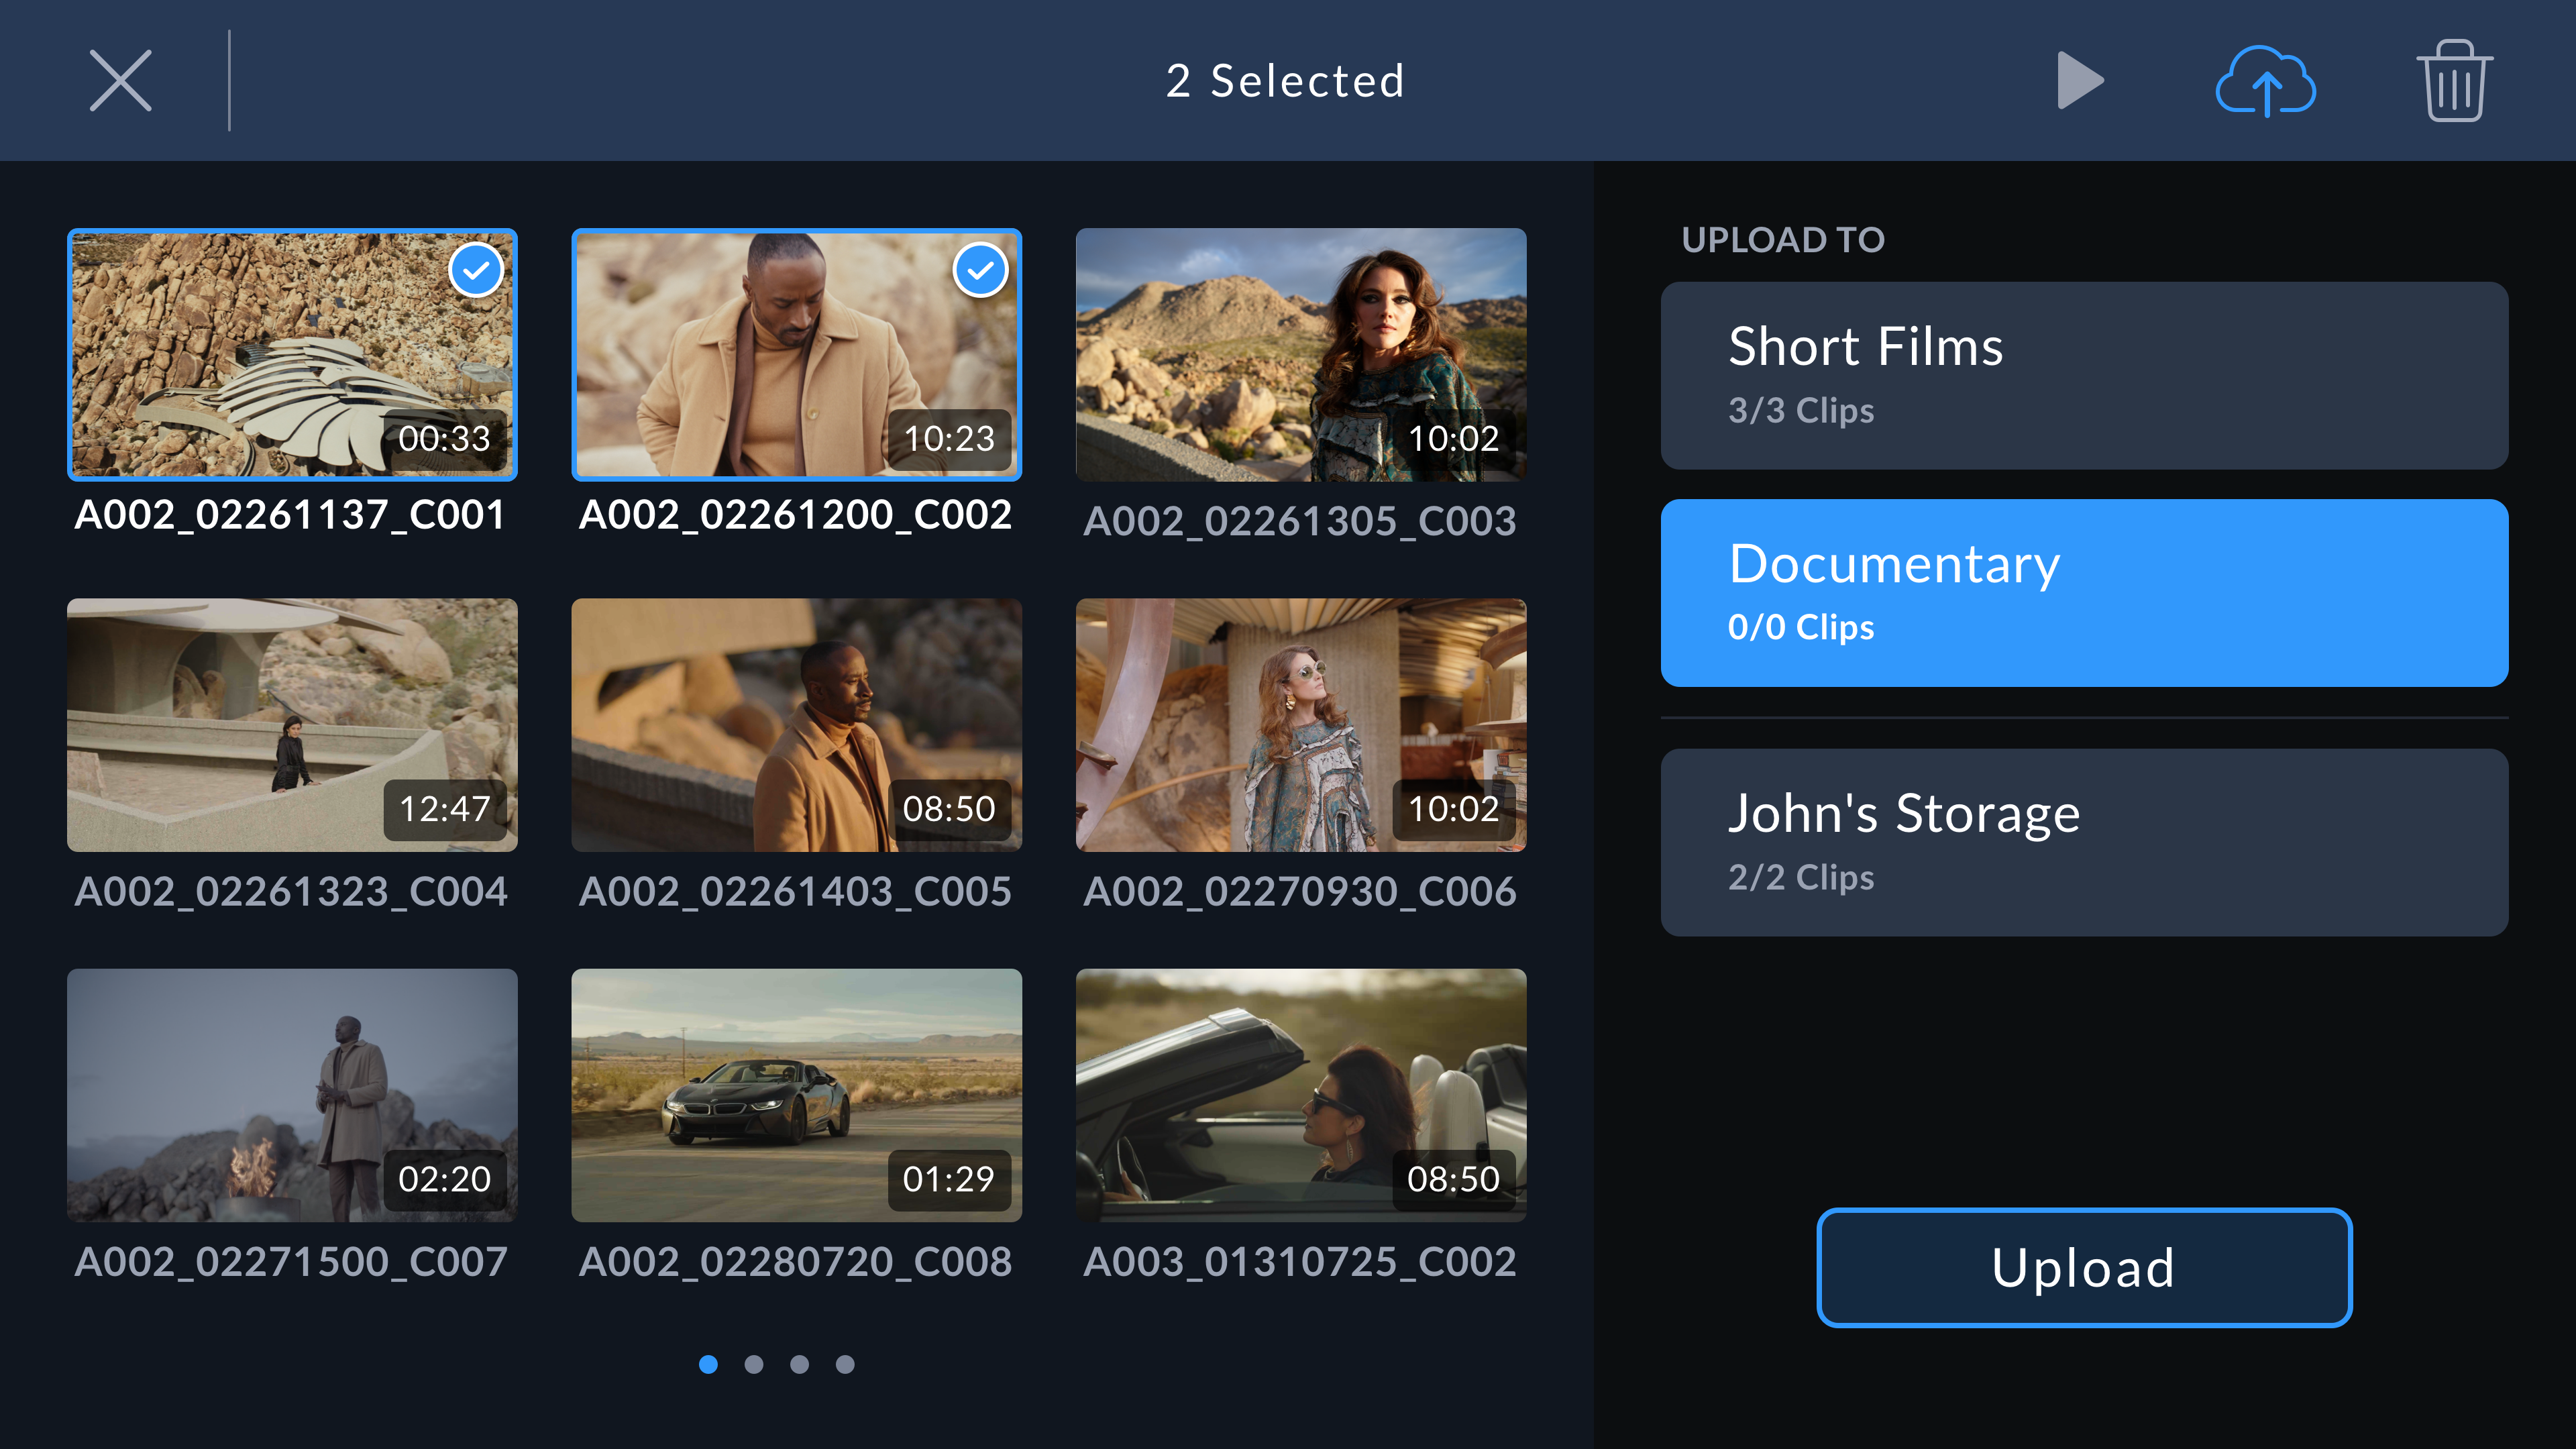
- Tap 'upload'.
Upload Original#
When uploading clips to Blackmagic Cloud projects with ‘proxies only’ selected in your camera’s ‘setup’ settings, you can still choose to upload an original clip using the clip’s metadata viewer. For example, this can be helpful when you are shooting at high resolutions using Blackmagic RAW with low compression as the files can get very large. To save cellular upload data you may choose to upload proxies only and then upload specific original clips later as required.
To upload an original clip:
- Select the Blackmagic Cloud project from the projects panel and tap the clip to open it in the playback viewer.
-
Tap the 'information' icon in the controls menu to display the clip's metadata.
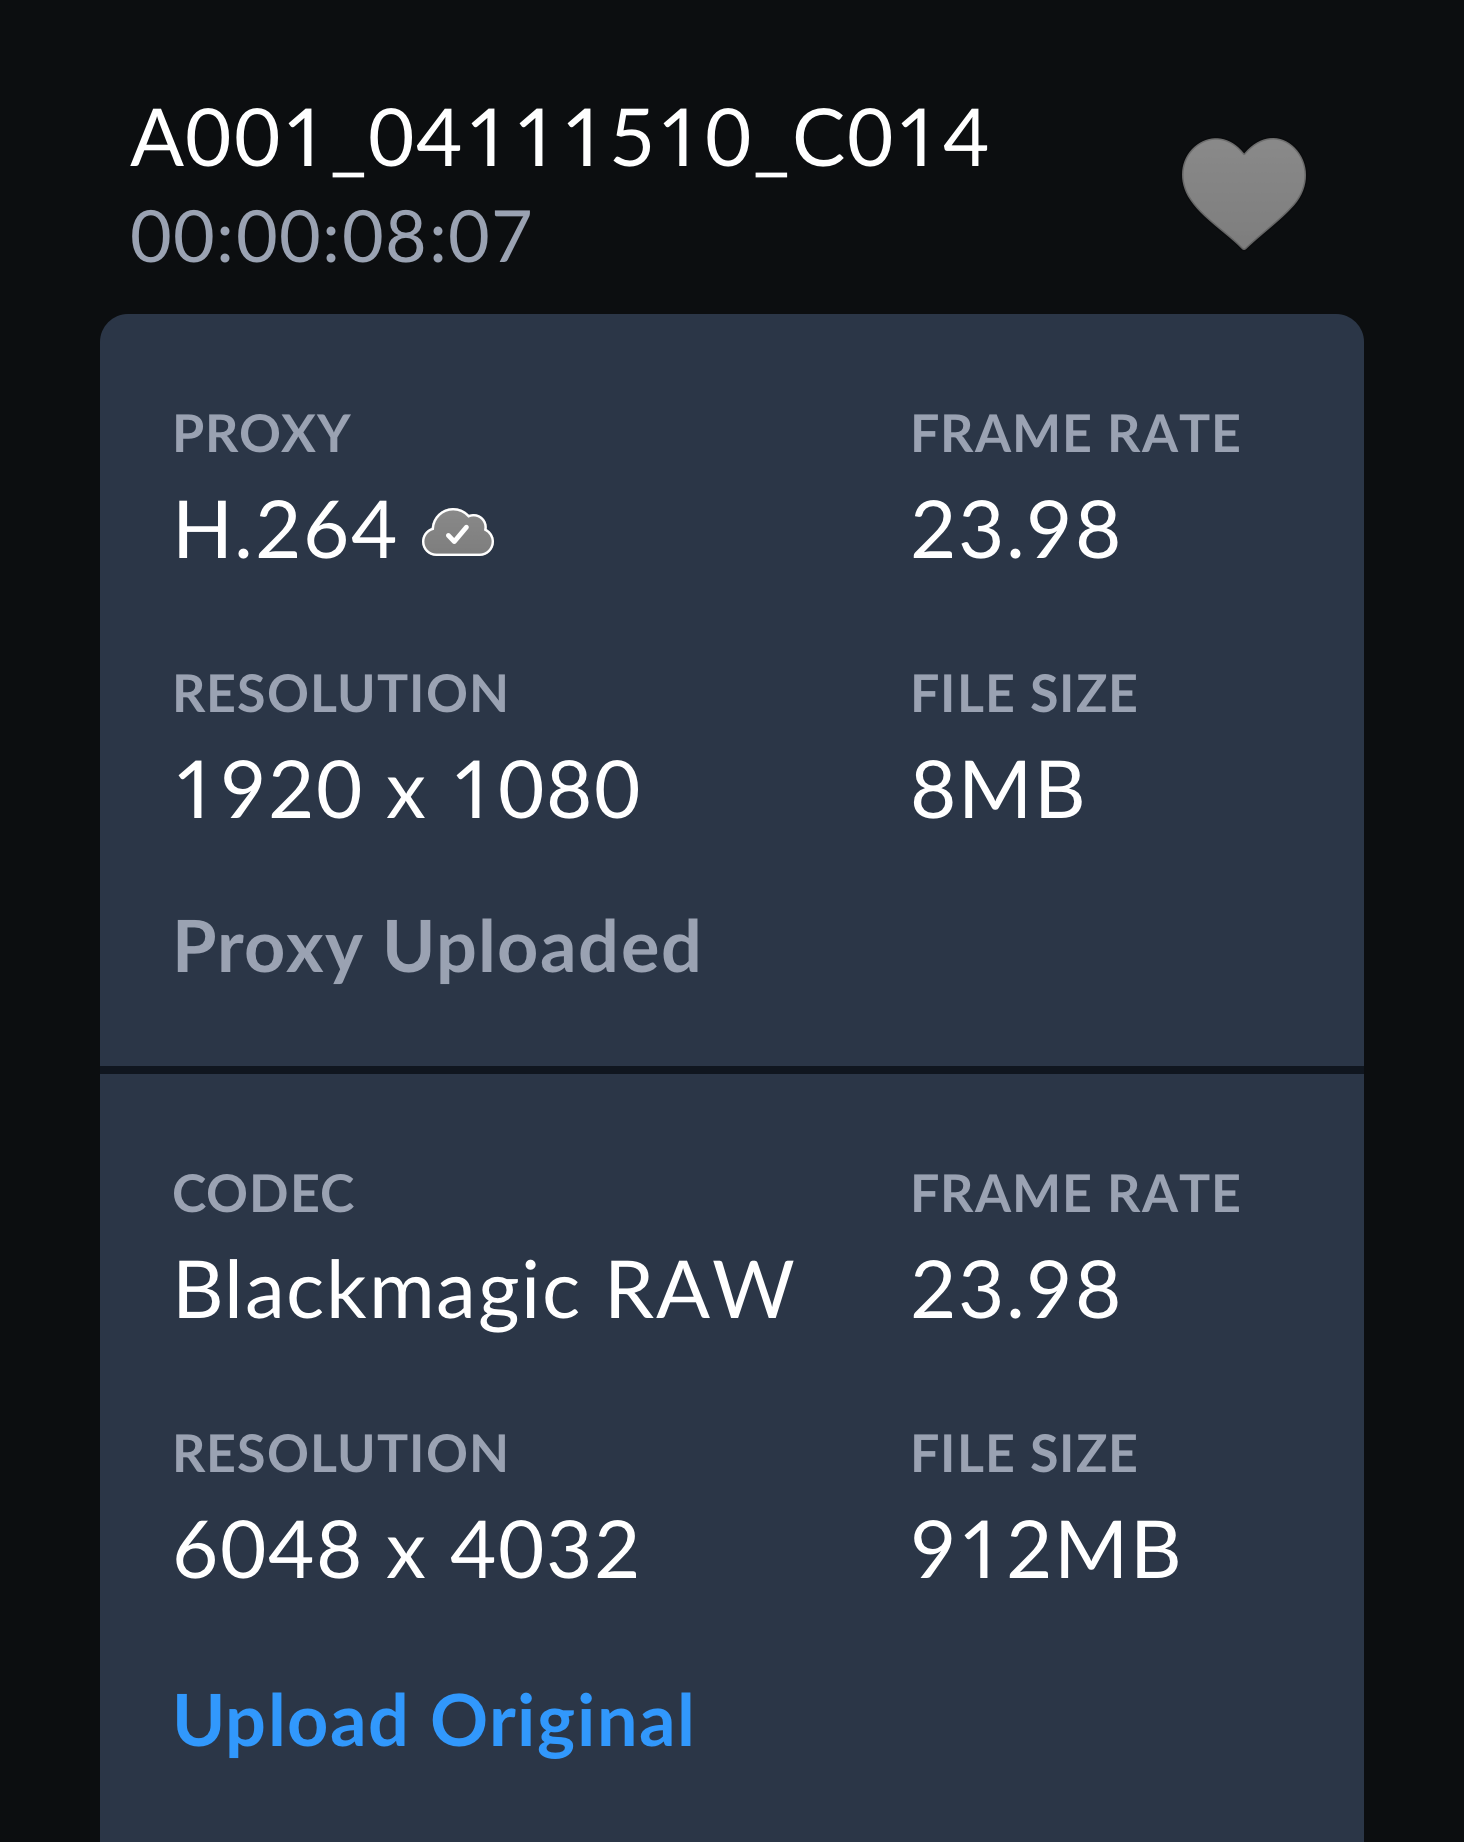
- In the metadata window, scroll to the section that displays metadata information for your clip's original file. Tap the 'upload original' button.
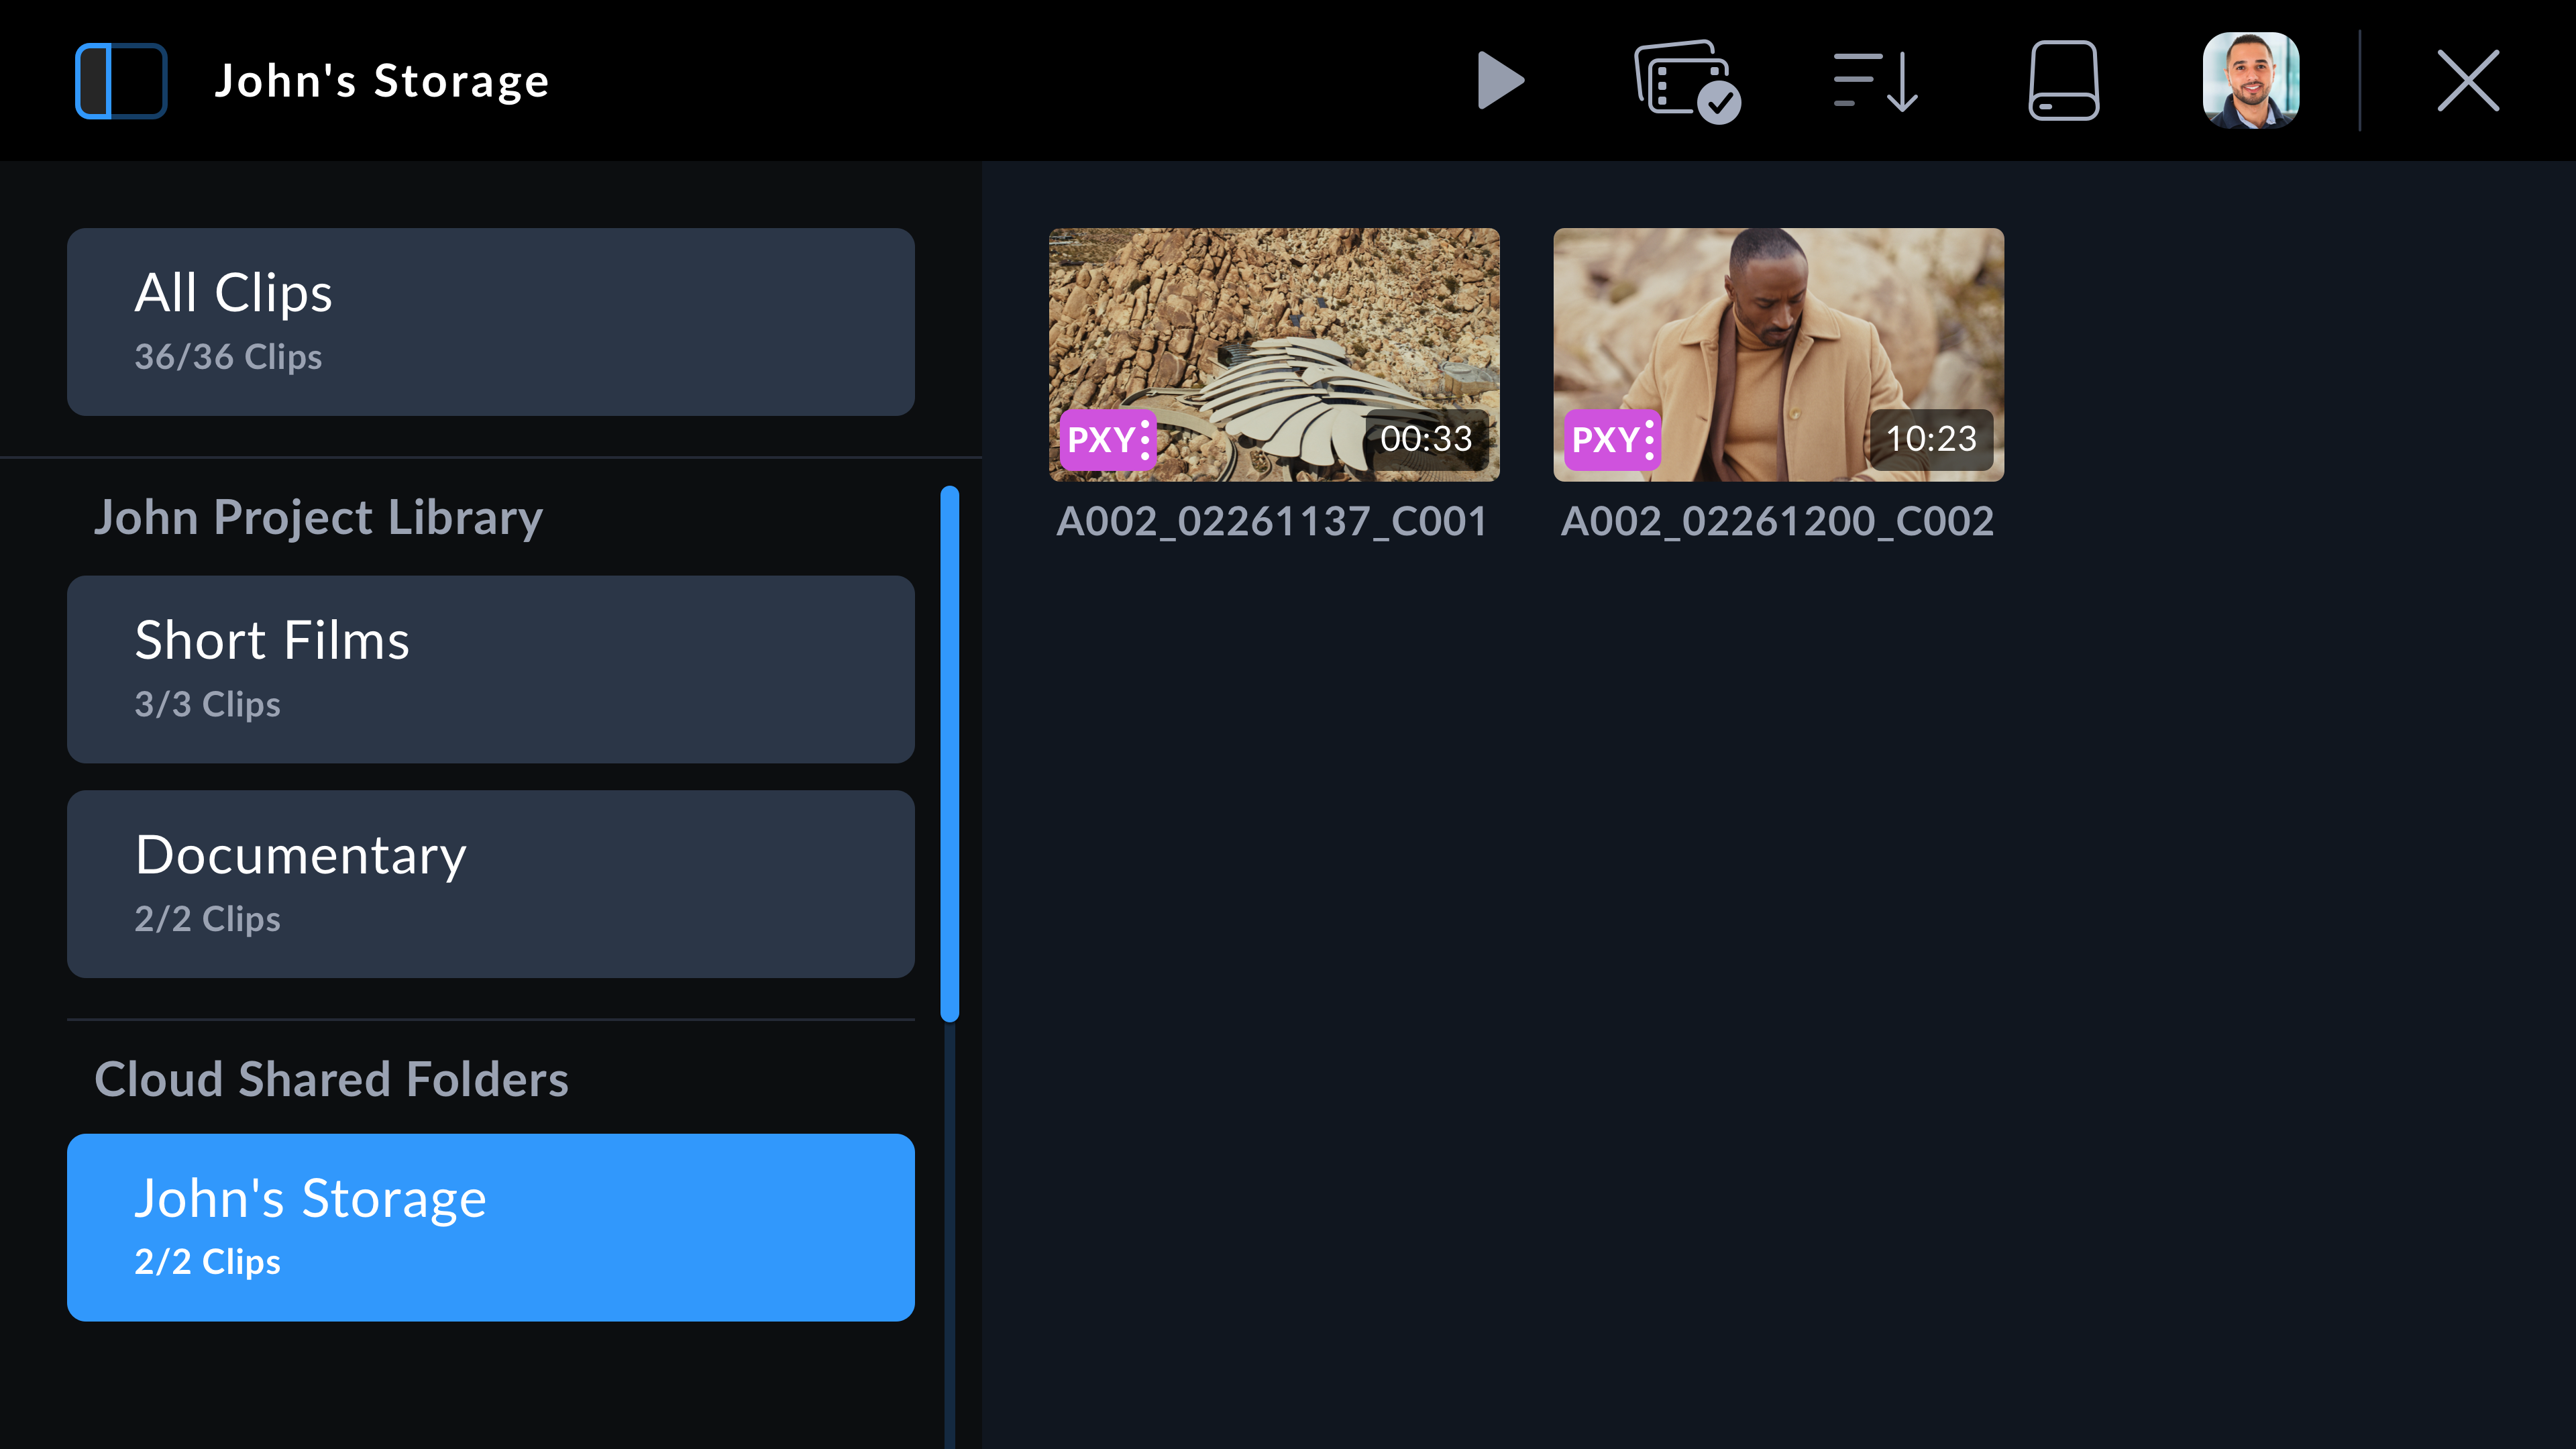
Uploading to your Blackmagic Cloud Storage#
You can also choose to upload clips directly to your own private Blackmagic Cloud storage. This can be useful if you want to upload and back up clips but not into a specific DaVinci Resolve project. Access your cloud storage by logging into your Blackmagic Cloud account on your computer and selecting ‘cloud storage’ from the menu.
To upload clips to your Blackmagic Cloud storage:
- Tap the sidebar icon at the top left of the Blackmagic Cloud project panel.
-
Scroll to the bottom of the project list and select your cloud storage, this will be named with your Blackmagic Cloud user name, followed by 'storage'.
- Tap your private Blackmagic Cloud storage to select it.
Clip Upload Status Indicators#
When you have chosen to upload clips to a Blackmagic Cloud project, you can check the upload status by selecting the project from the Blackmagic Cloud projects panel.
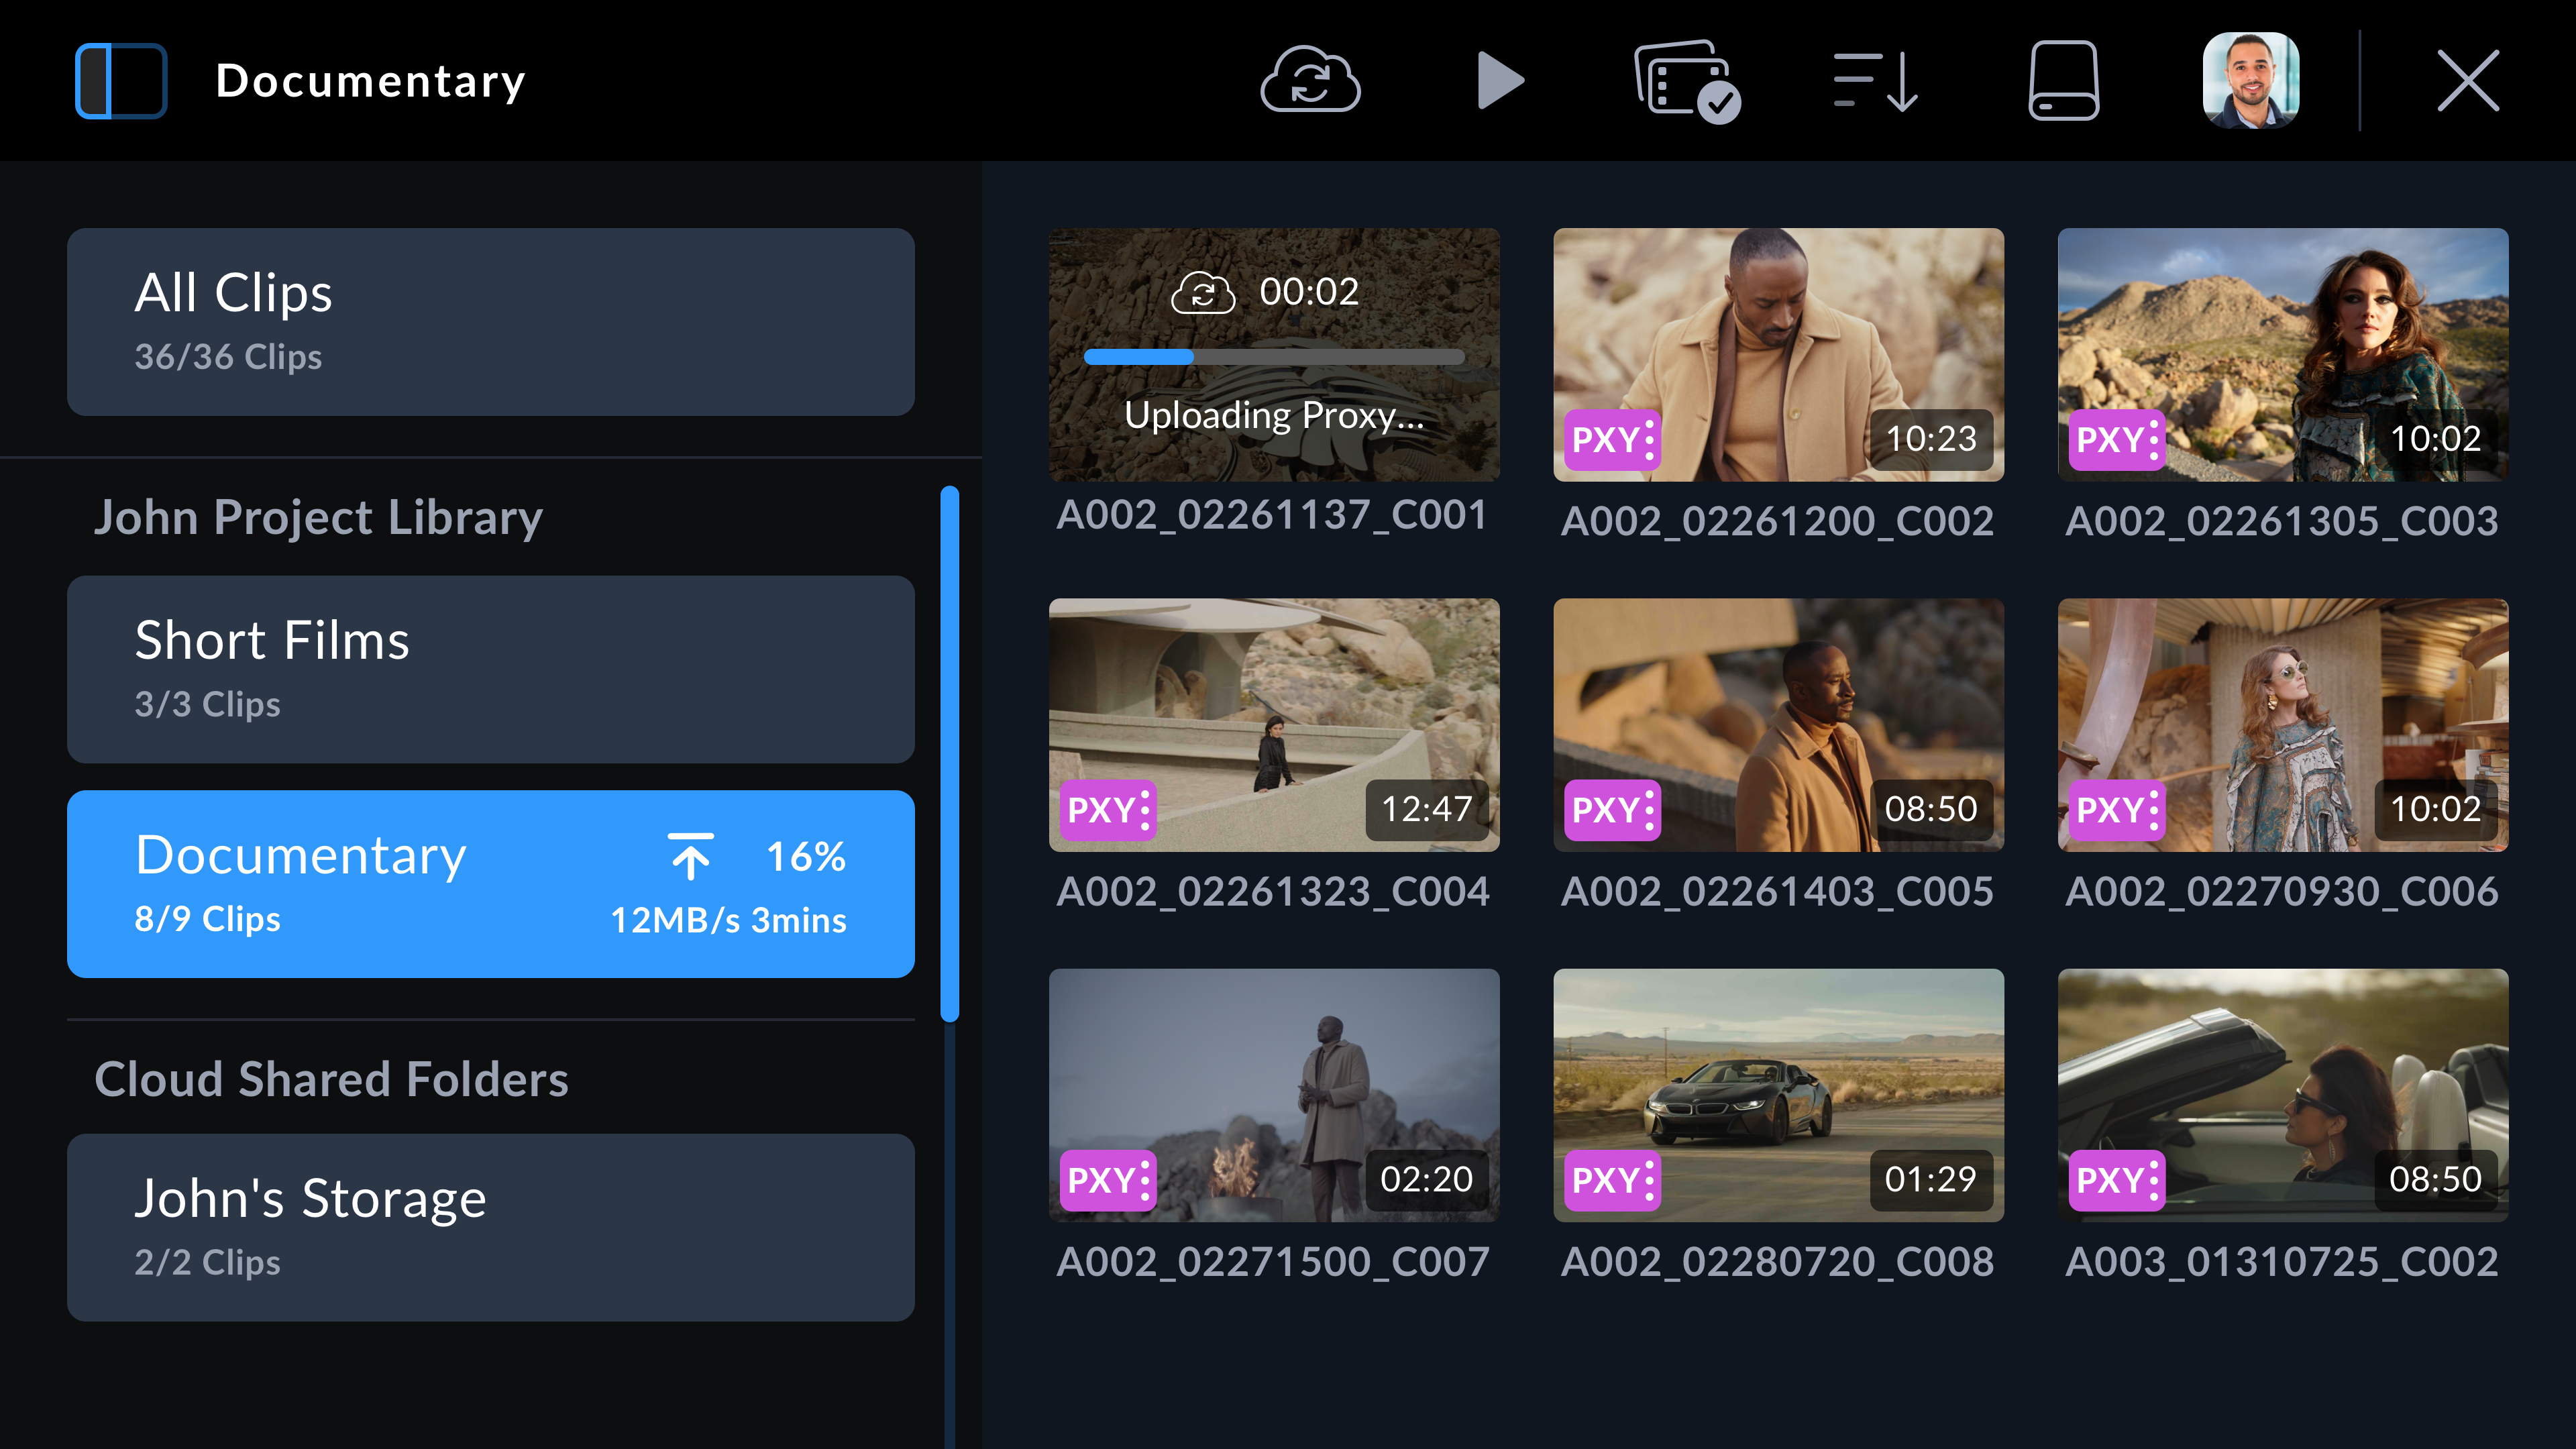
Next to the cloud project name the overall upload status is displayed including number of clips, completed percentage, upload speed and estimated time remaining.
The upload status for each clip is displayed on the clip thumbnail:
Closing the Media Pool#
When you have finished using the media pool and want to return to the live recording view on your camera’s LCD, tap the ‘X’ icon at the top right corner of the menu controls.